
")
")
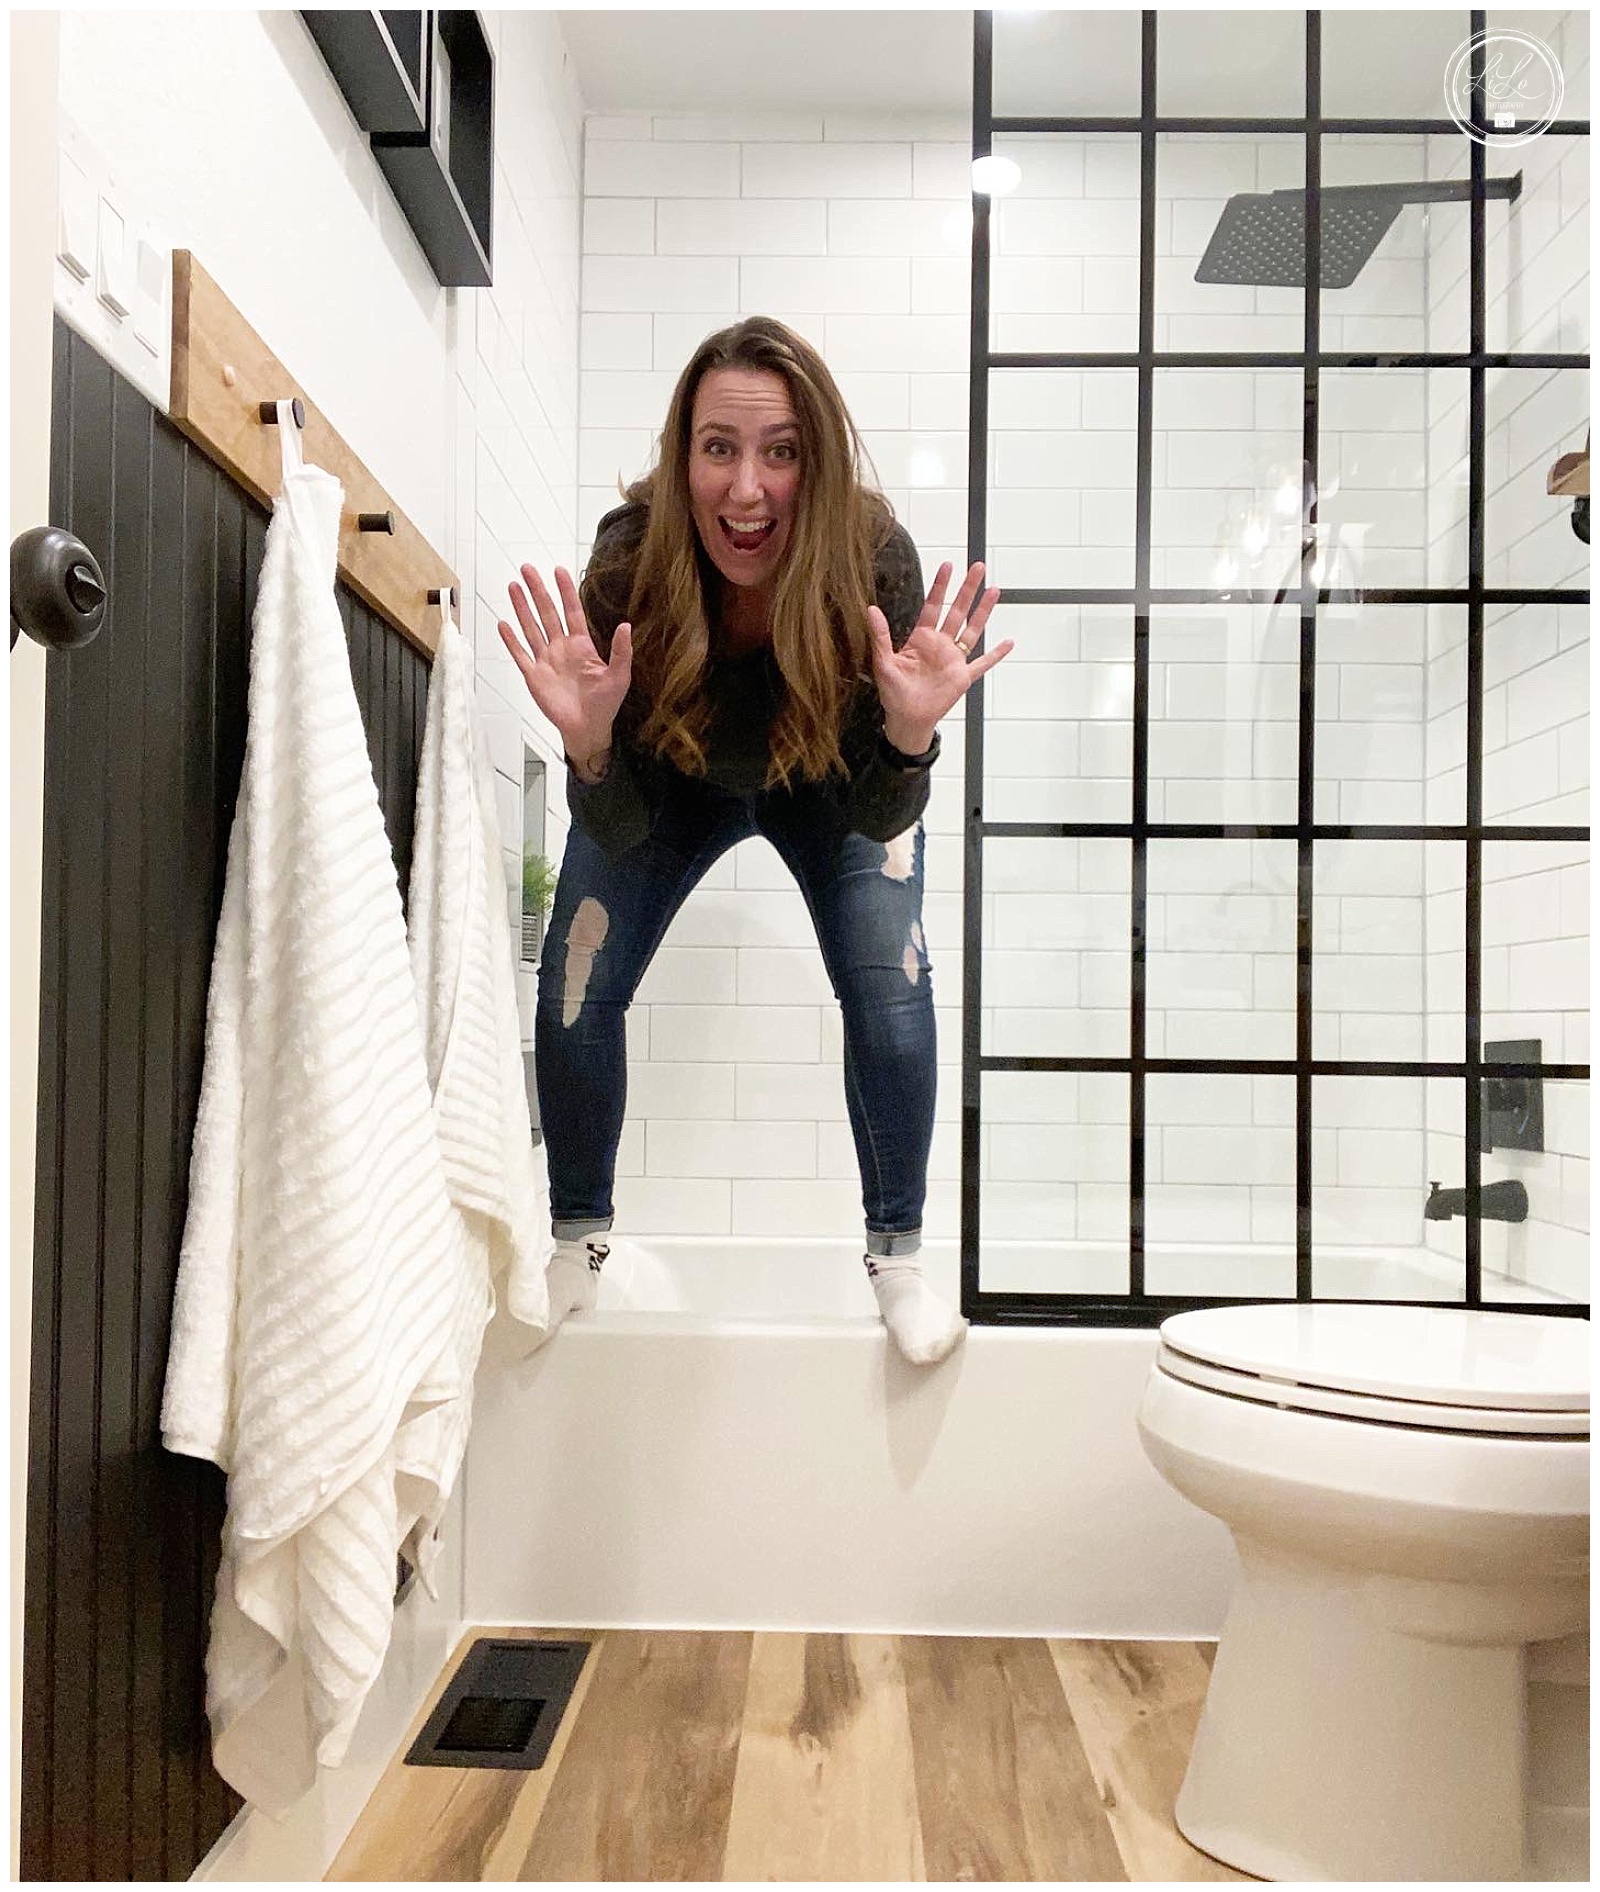
At the beginning of 2021, I decided I want to redo the “guest/kids/main” bathroom ALL BY MYSELF (or as my son used to say “all my byself”). Sorry for the grainy iphone pic.
My dad is SUPER handy and pretty much built every square inch of my childhood home. He had all daughters and therefore, we learned (often reluctantly) how to DIY from the master himself. It is just a part of who I am and who our family was. I also have a VERY handy husband who works in construction and knows how to do almost anything. We have redone quite a bit of our house over the last 20 years and it has all been DIY.
He was in the midst of a really busy season at work and I wanted to start the bathroom project. He didn’t have the bandwidth so I decided I was going to tackle it alone. My dad has helped us redo the kitchen and finish our basement, so I knew how to do a lot of the work already. However, this was going to be my first solo run. Don’t get me wrong….I had plenty of help and guidance along the way, but I did 90% of the work ALONE!
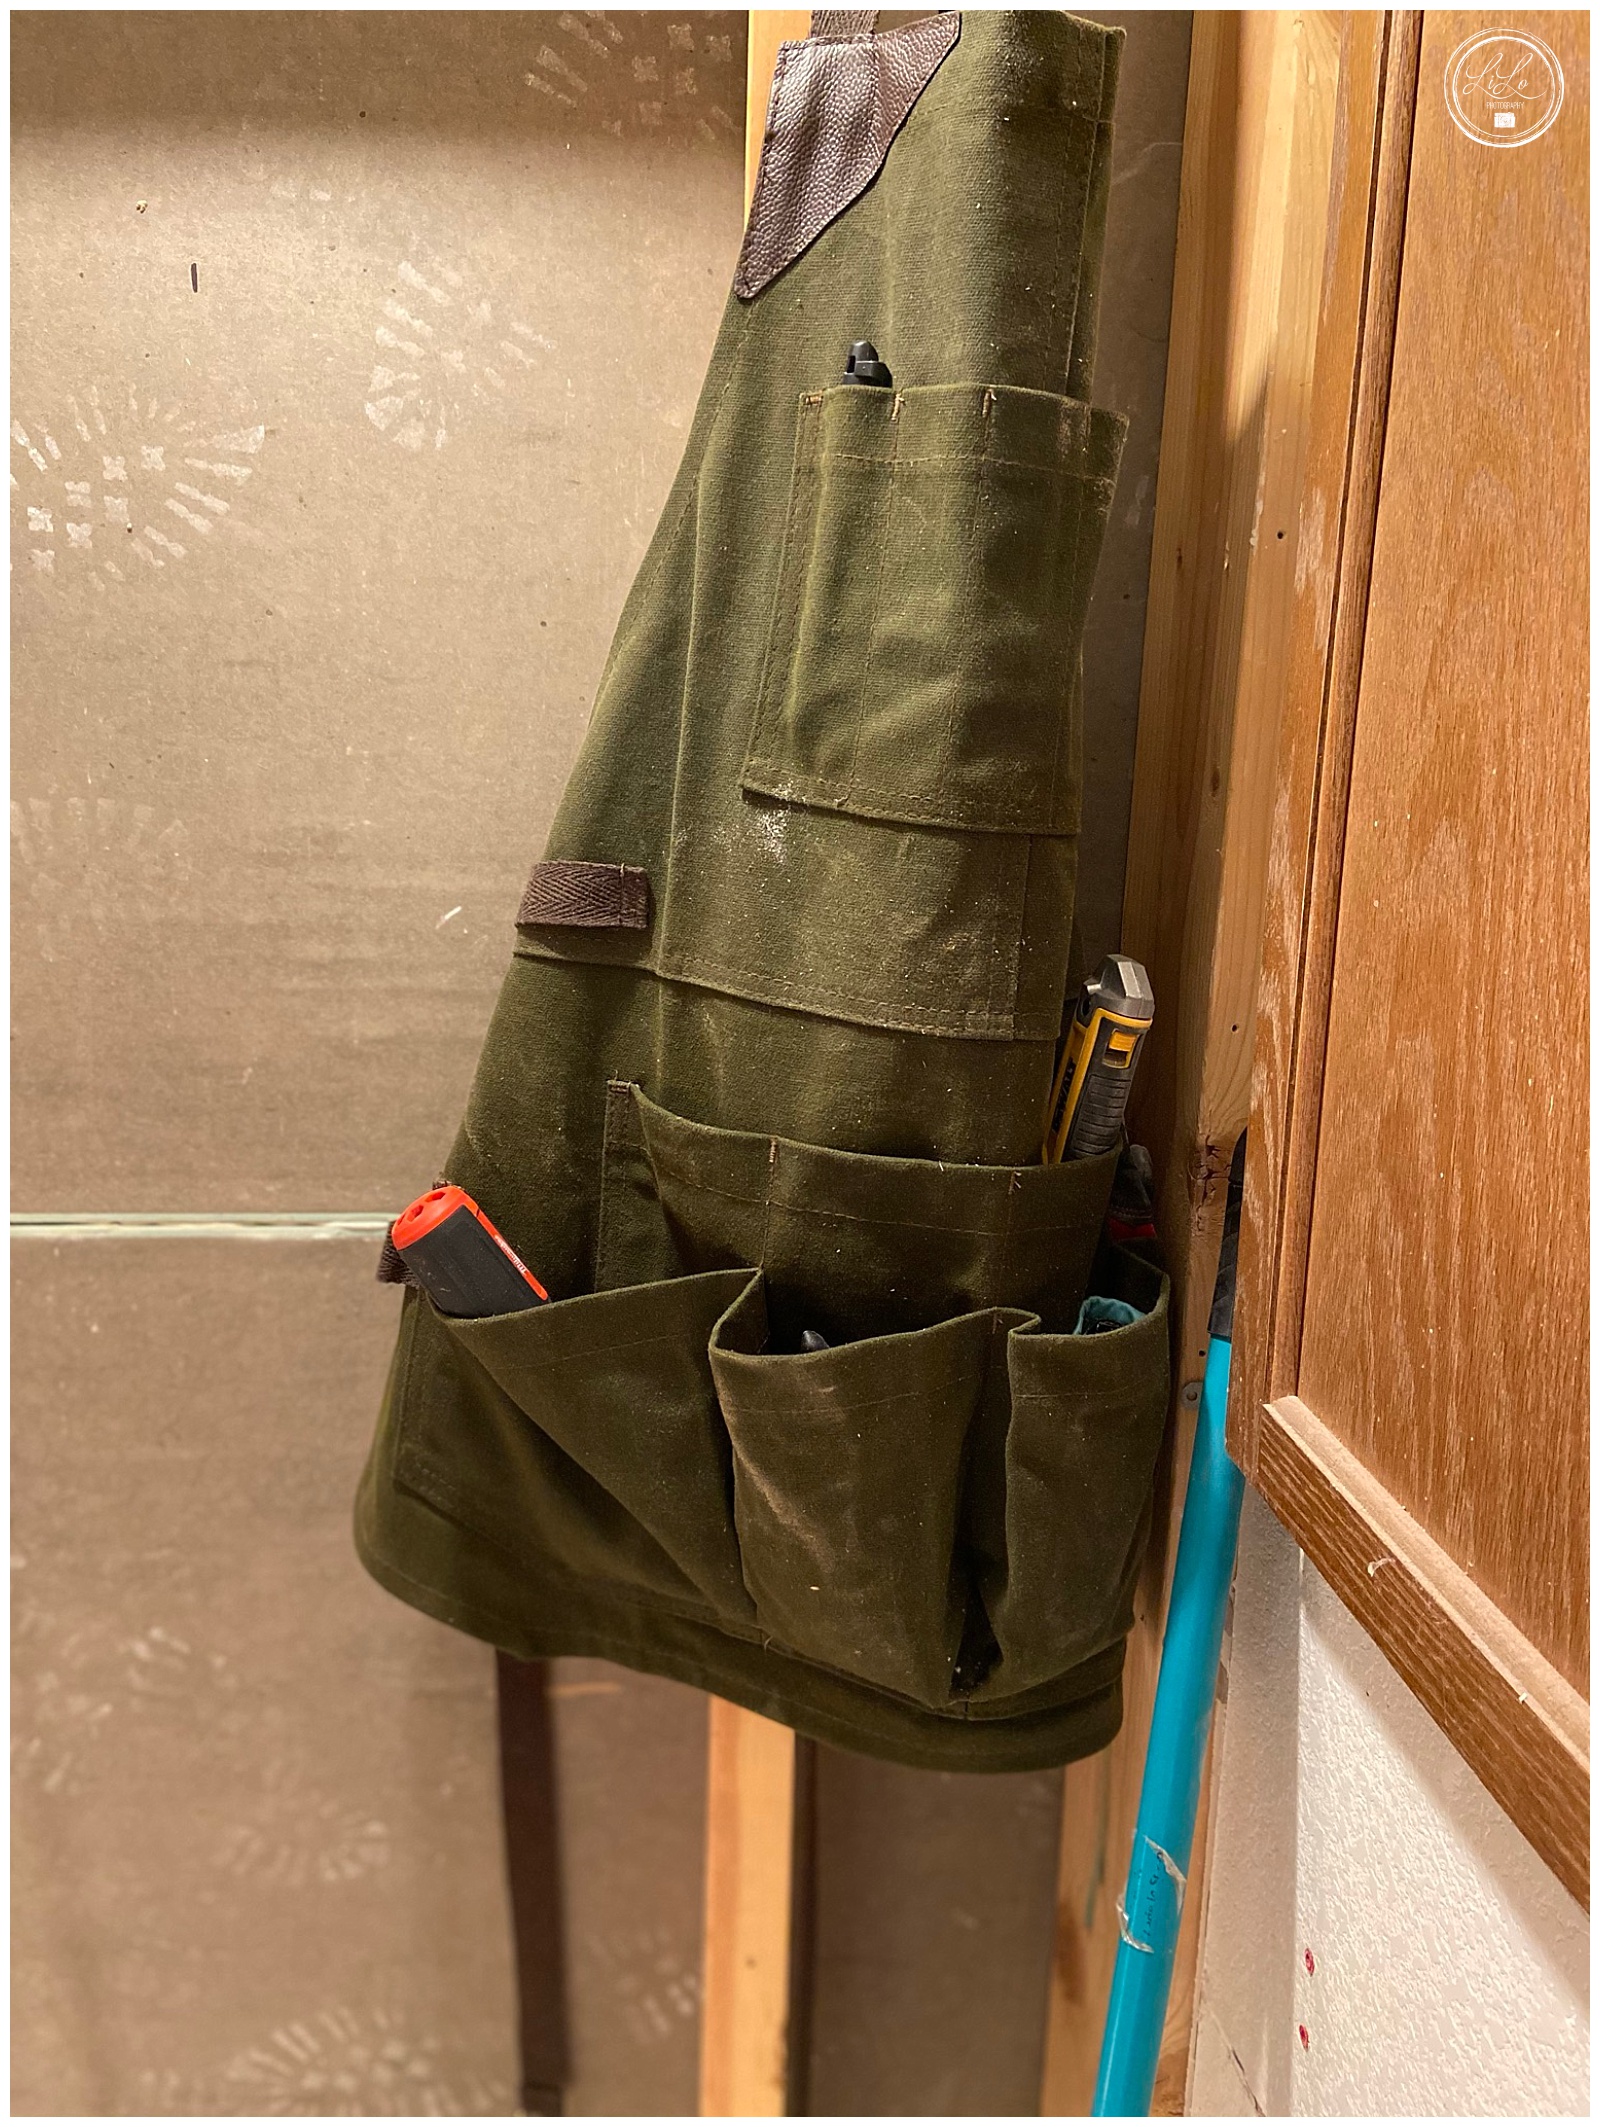
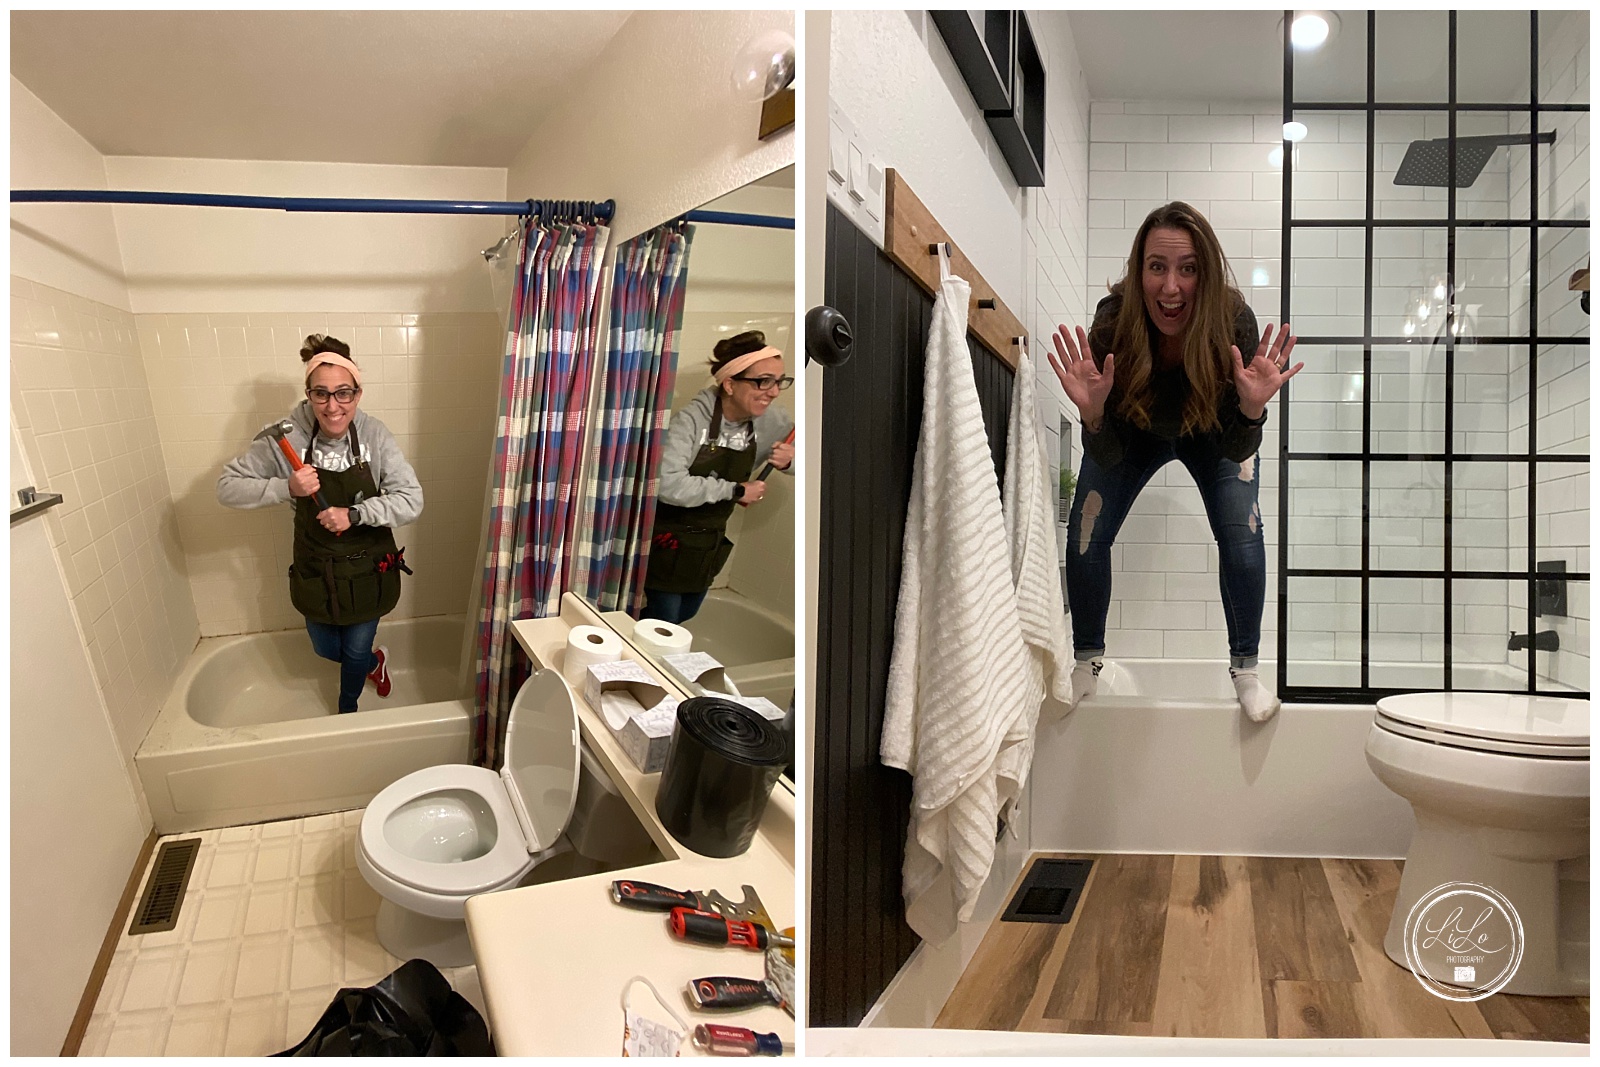
My love language is gifts so when my husband got me this apron (which I affectionately called Polly–because of all of the pockets) and some of my own tools, I was over the moon and was ready to take on the challenge.
There were moments of agony, both physical and mental and I struggled quite a bit. My husband was so good in that he didn’t just jump in and rescue me (although there were times when I wanted him to) but he let me sit in the struggle and figure it out and I am so glad he did. It just made the finished product so much sweeter! There are things that aren’t perfect and mistakes that I made along the way. But I am SO PROUD of myself.
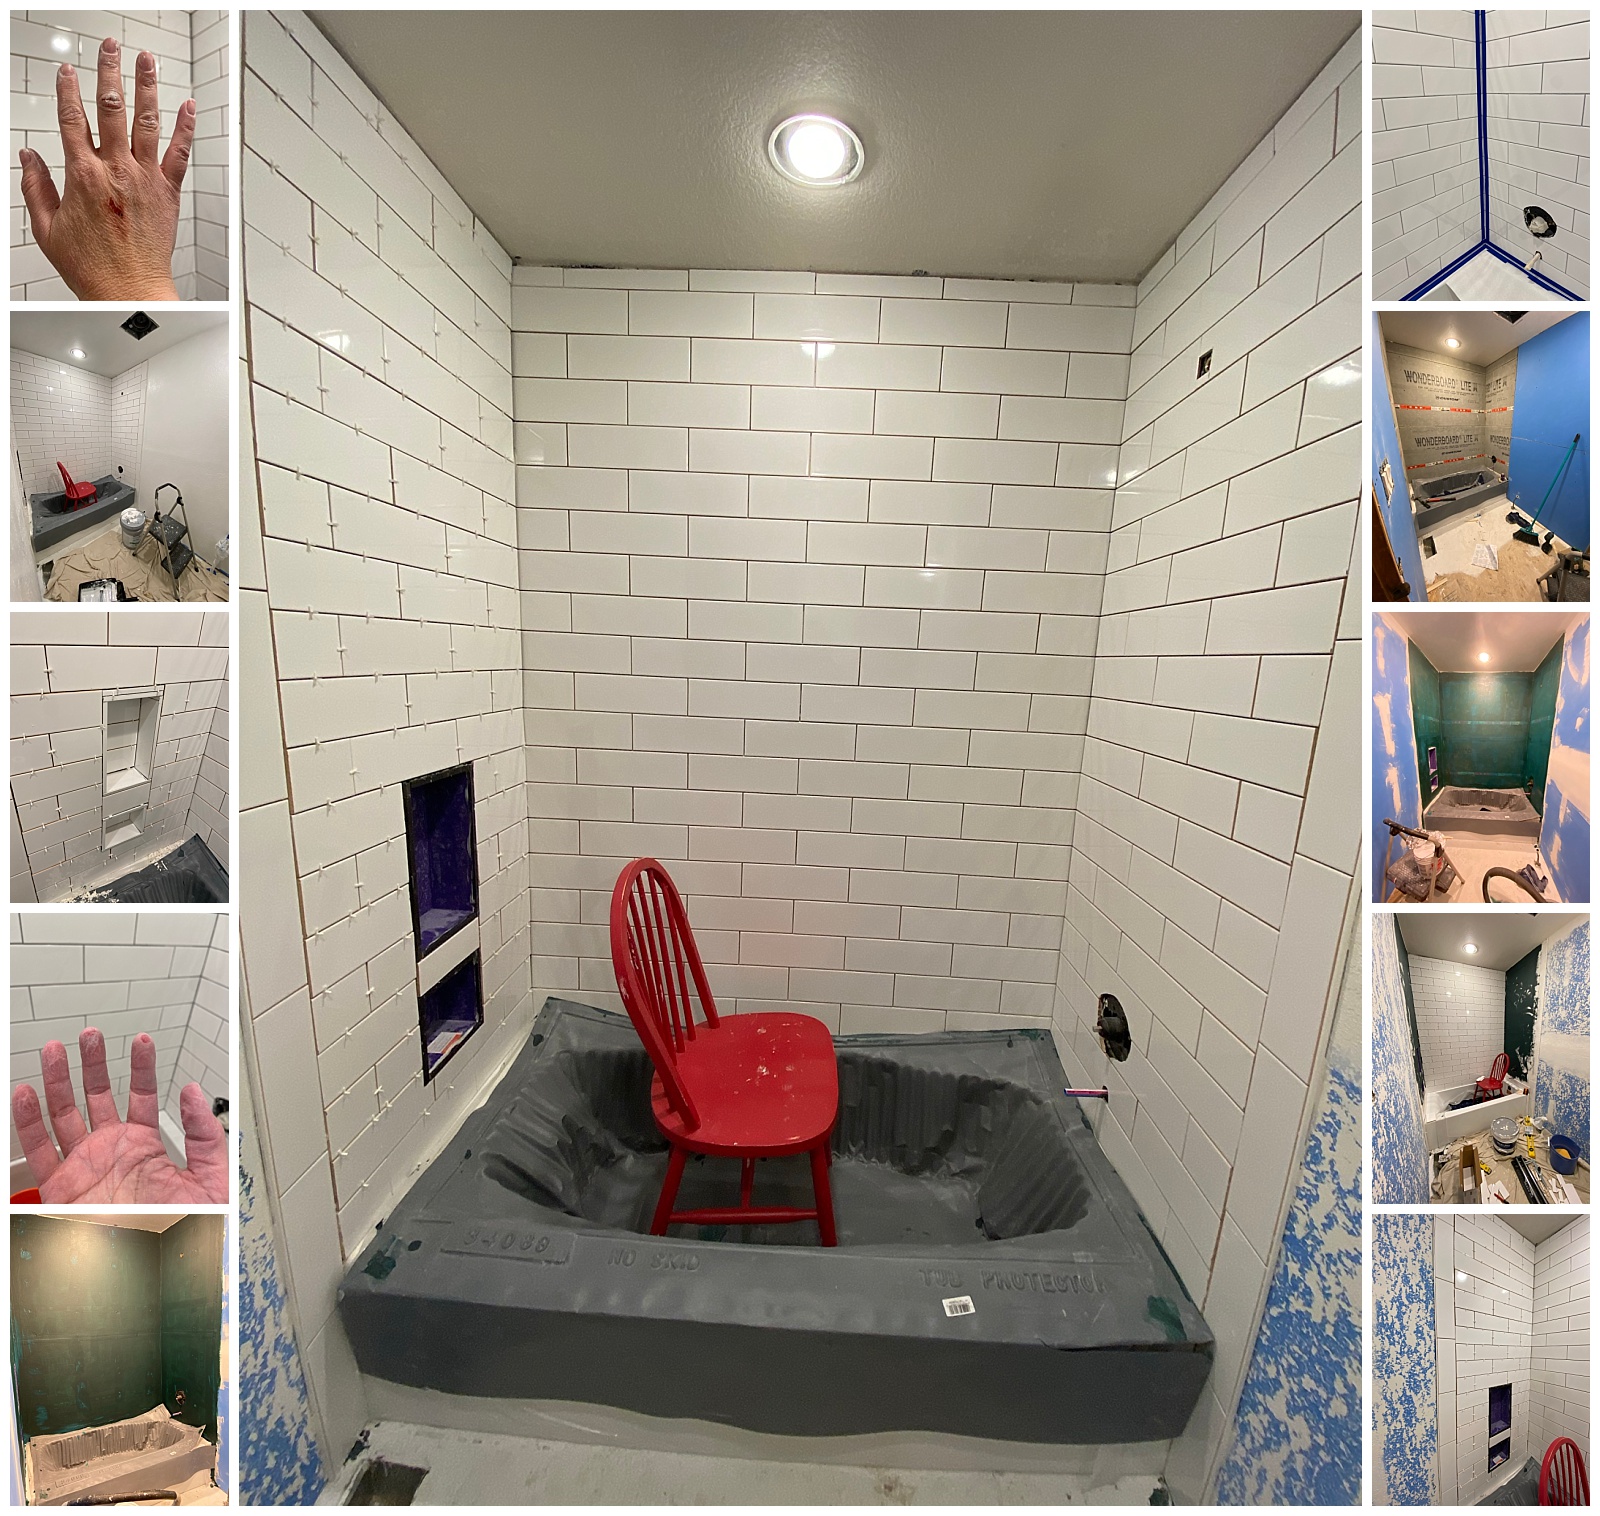
Now here is what you have been waiting for! The majority of these pictures were all taken with my cell phone as it was easier and more handy.
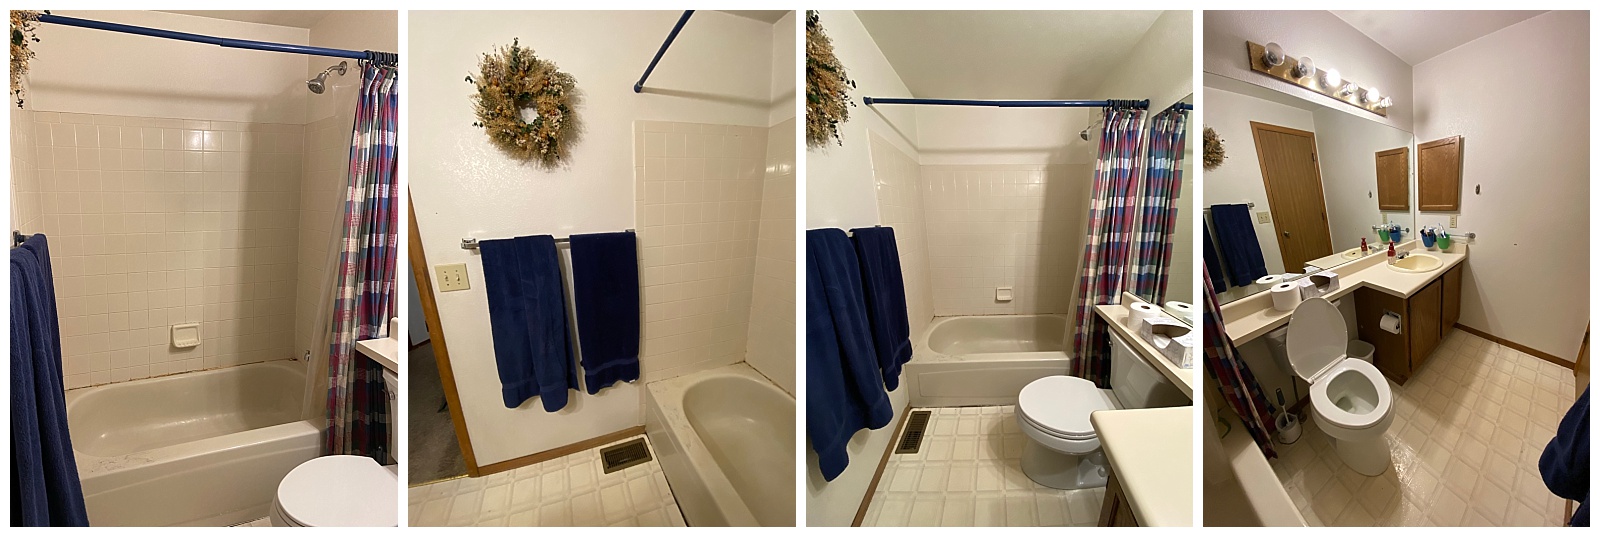
The Before:
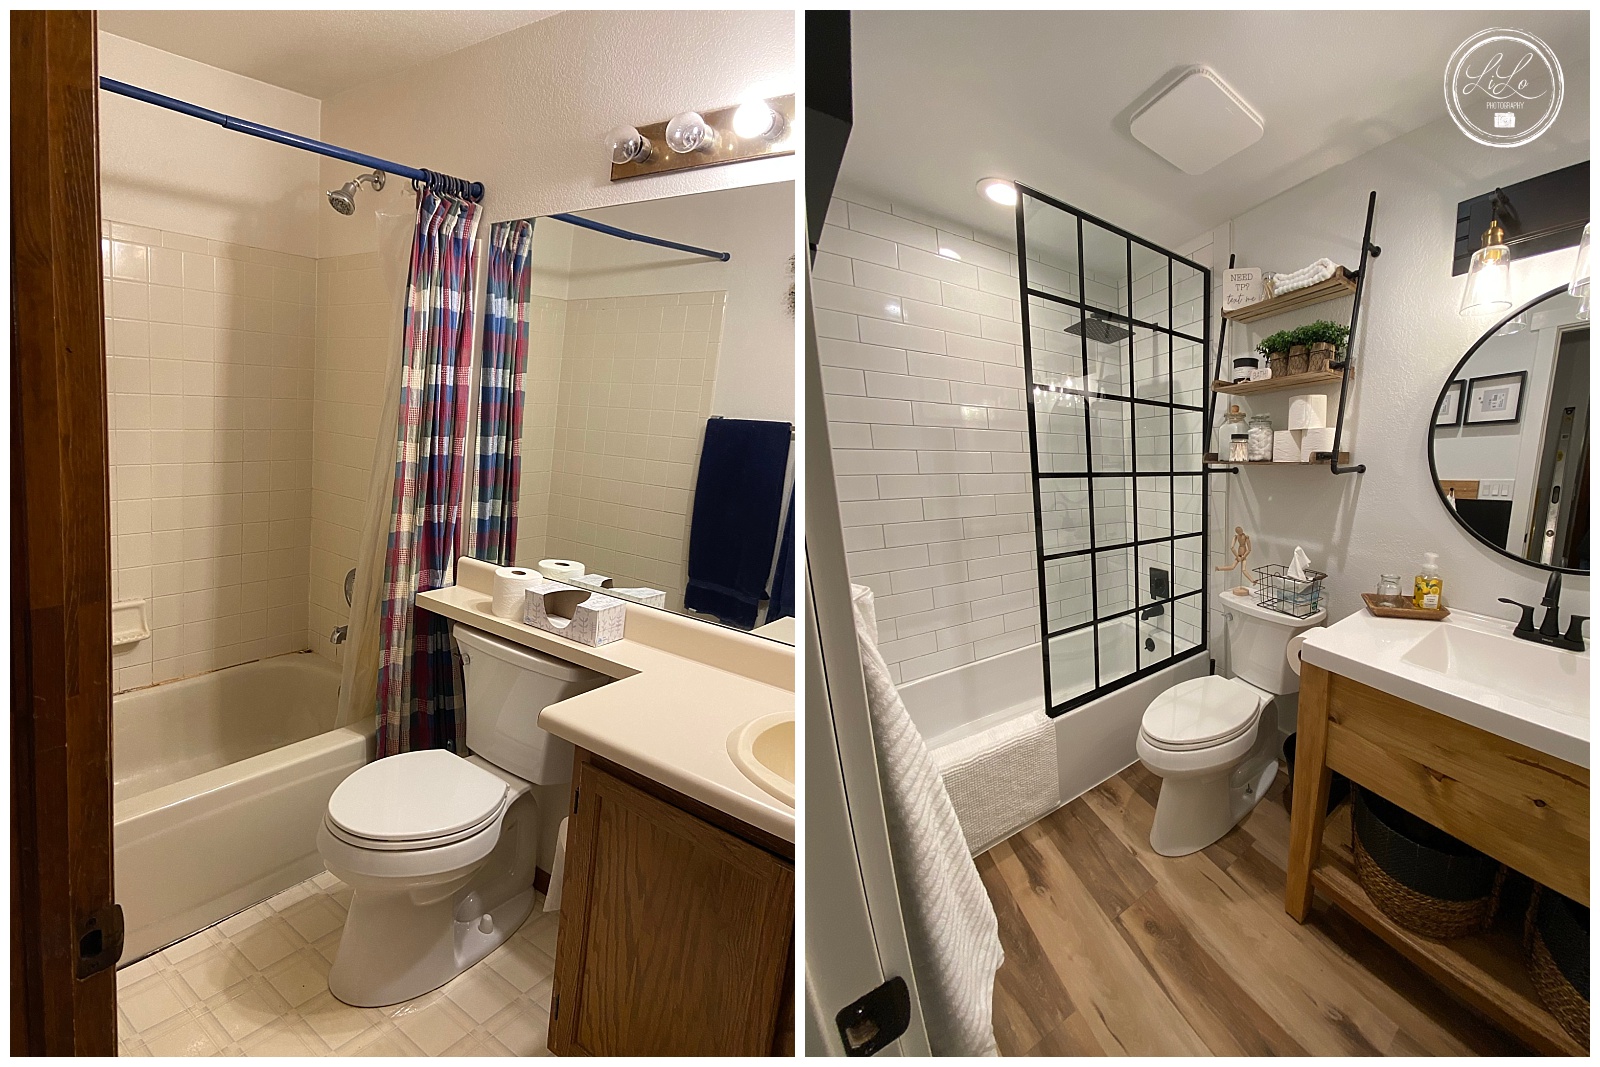
Our house was built in 1991 and was a basic track home. The sink was PLASTIC as was the faucet (what the heck). I hated it when we moved in in 2001 and so you can only imagine how much more I hated it 20 years later. We got this lovely shower curtain and rod when we were married in 1999 and it served us well for 22 years.
Demo:
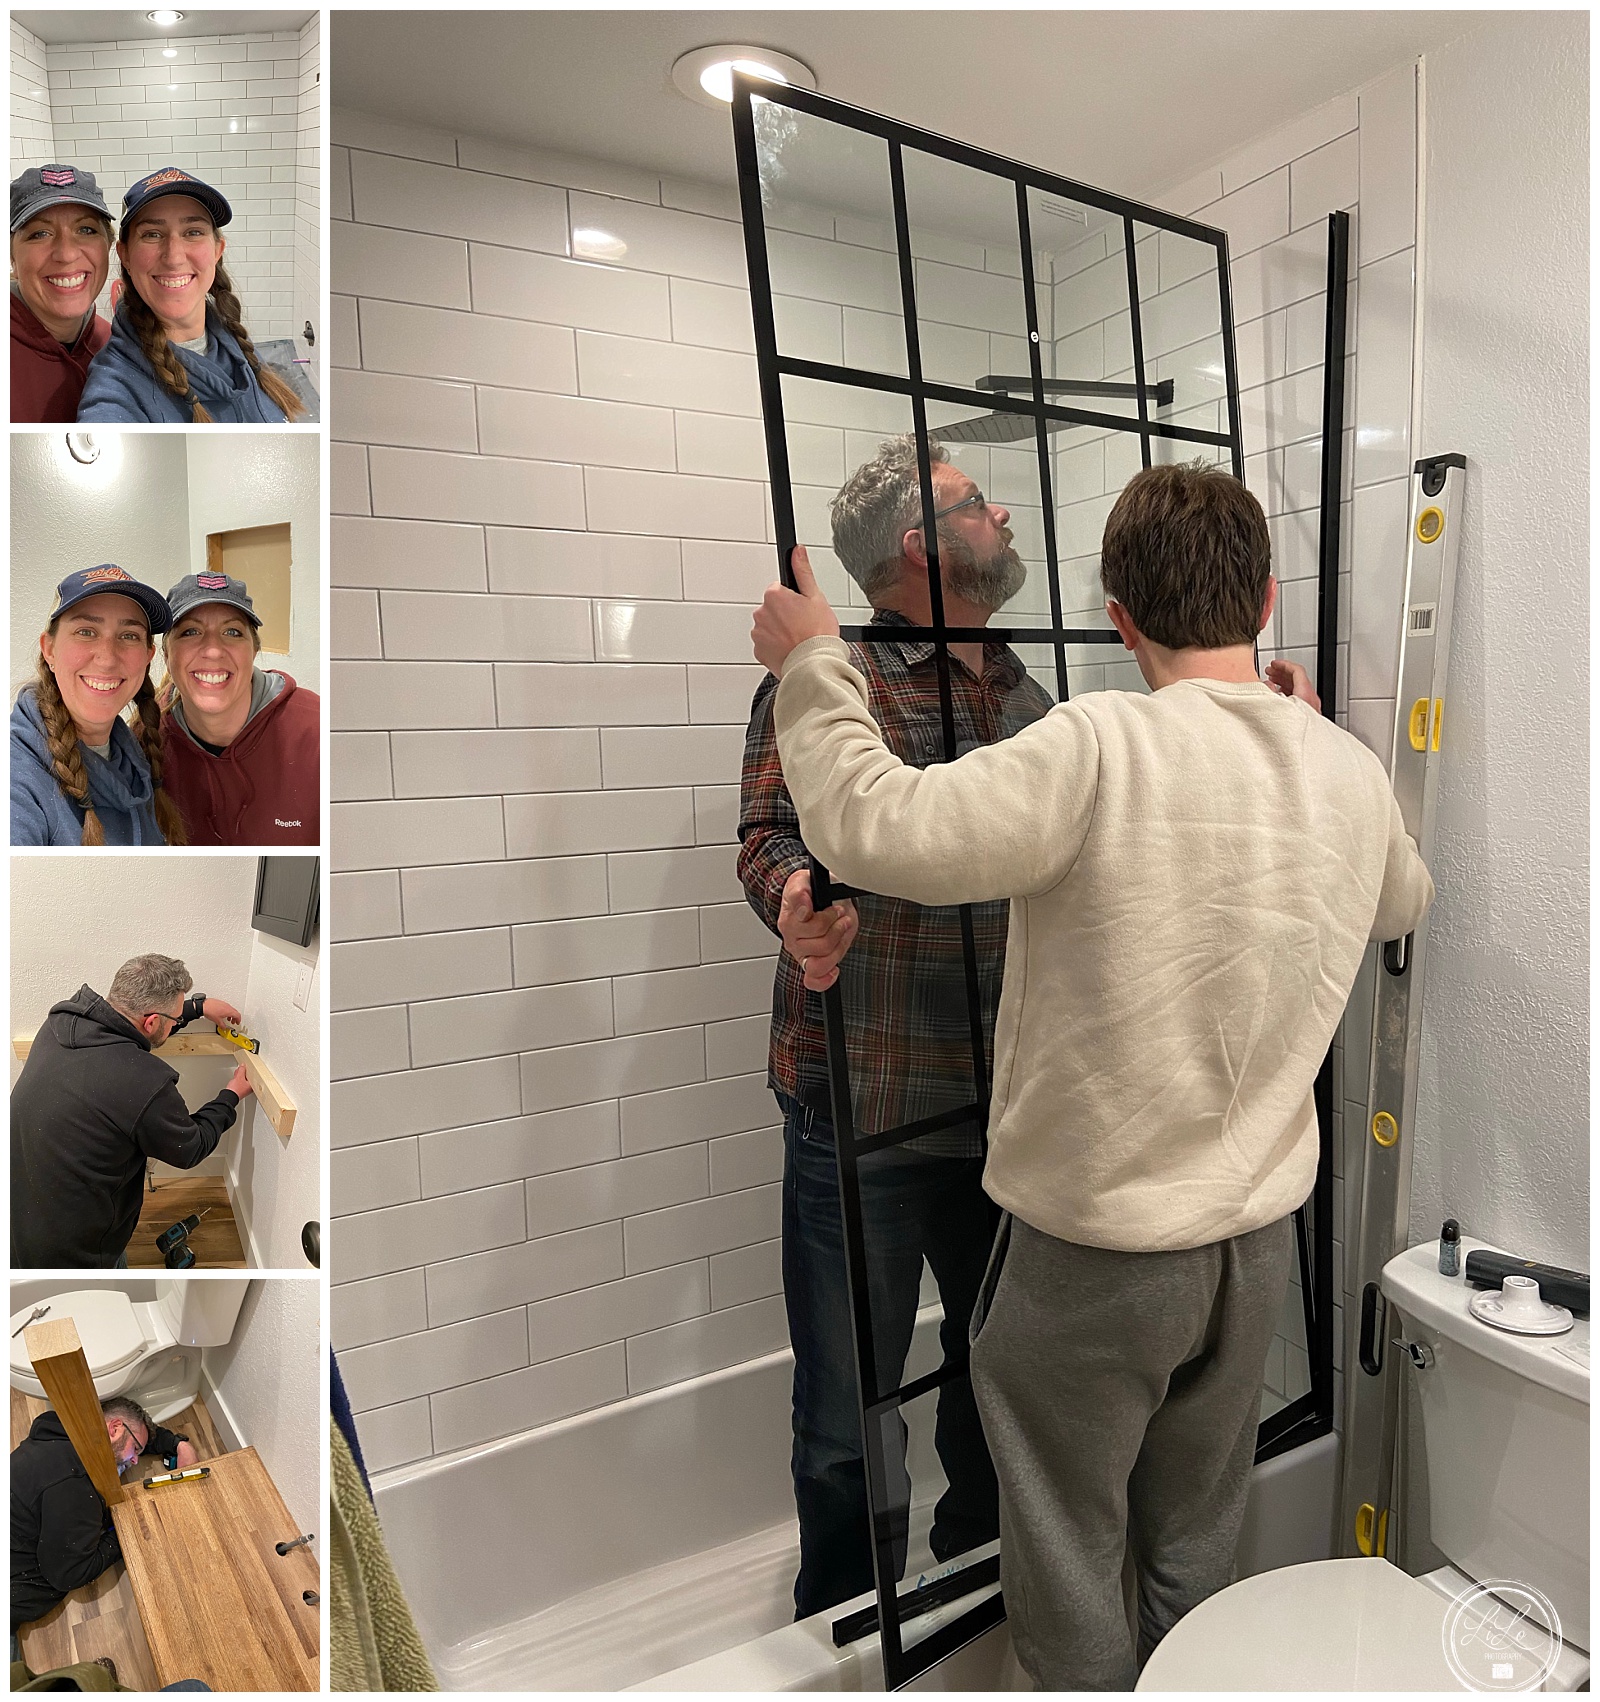
The first task at hand was to demo. This was the fun part. Taking a hammer to the wall is always good for the soul! It took me about 12 hours to demo this entire bathroom. My sister came over and helped me get down the mirror and take the vanity out and Chris helped me take out the toilet and bathtub.
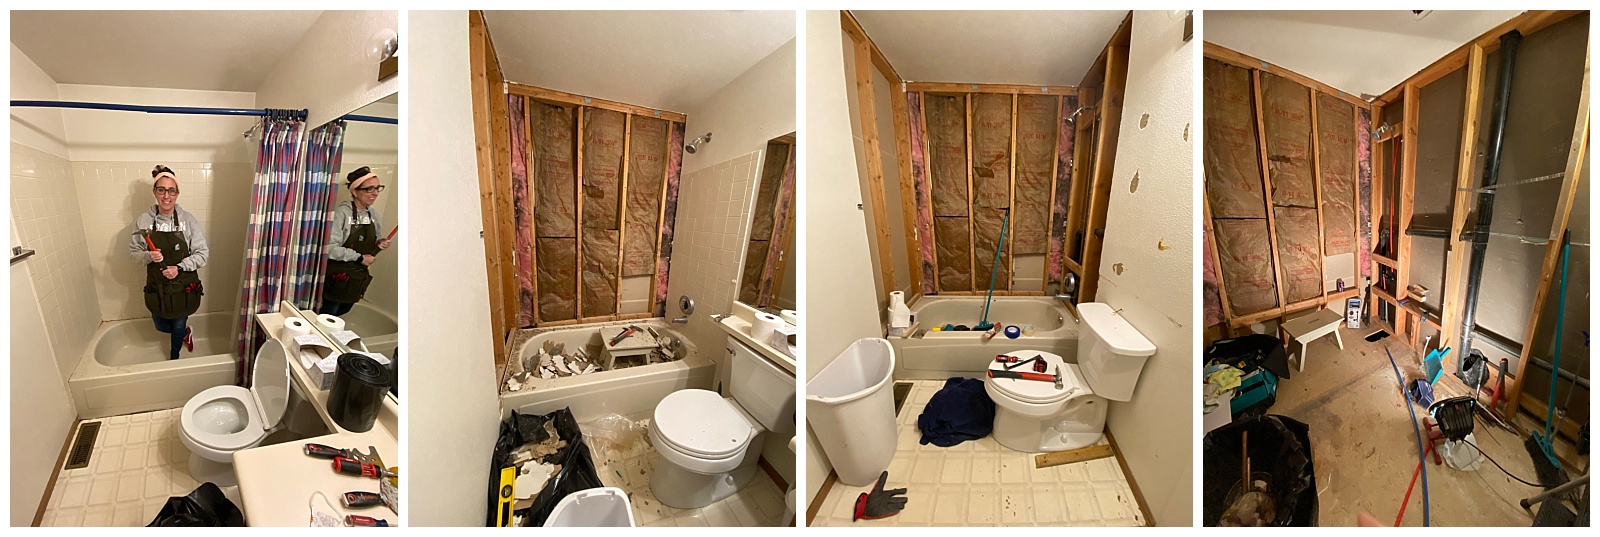
Can you believe that the mirror came out in one big piece with no breakage!? I taped the heck out of it and then just pried it off of the wall. Easy peasy!
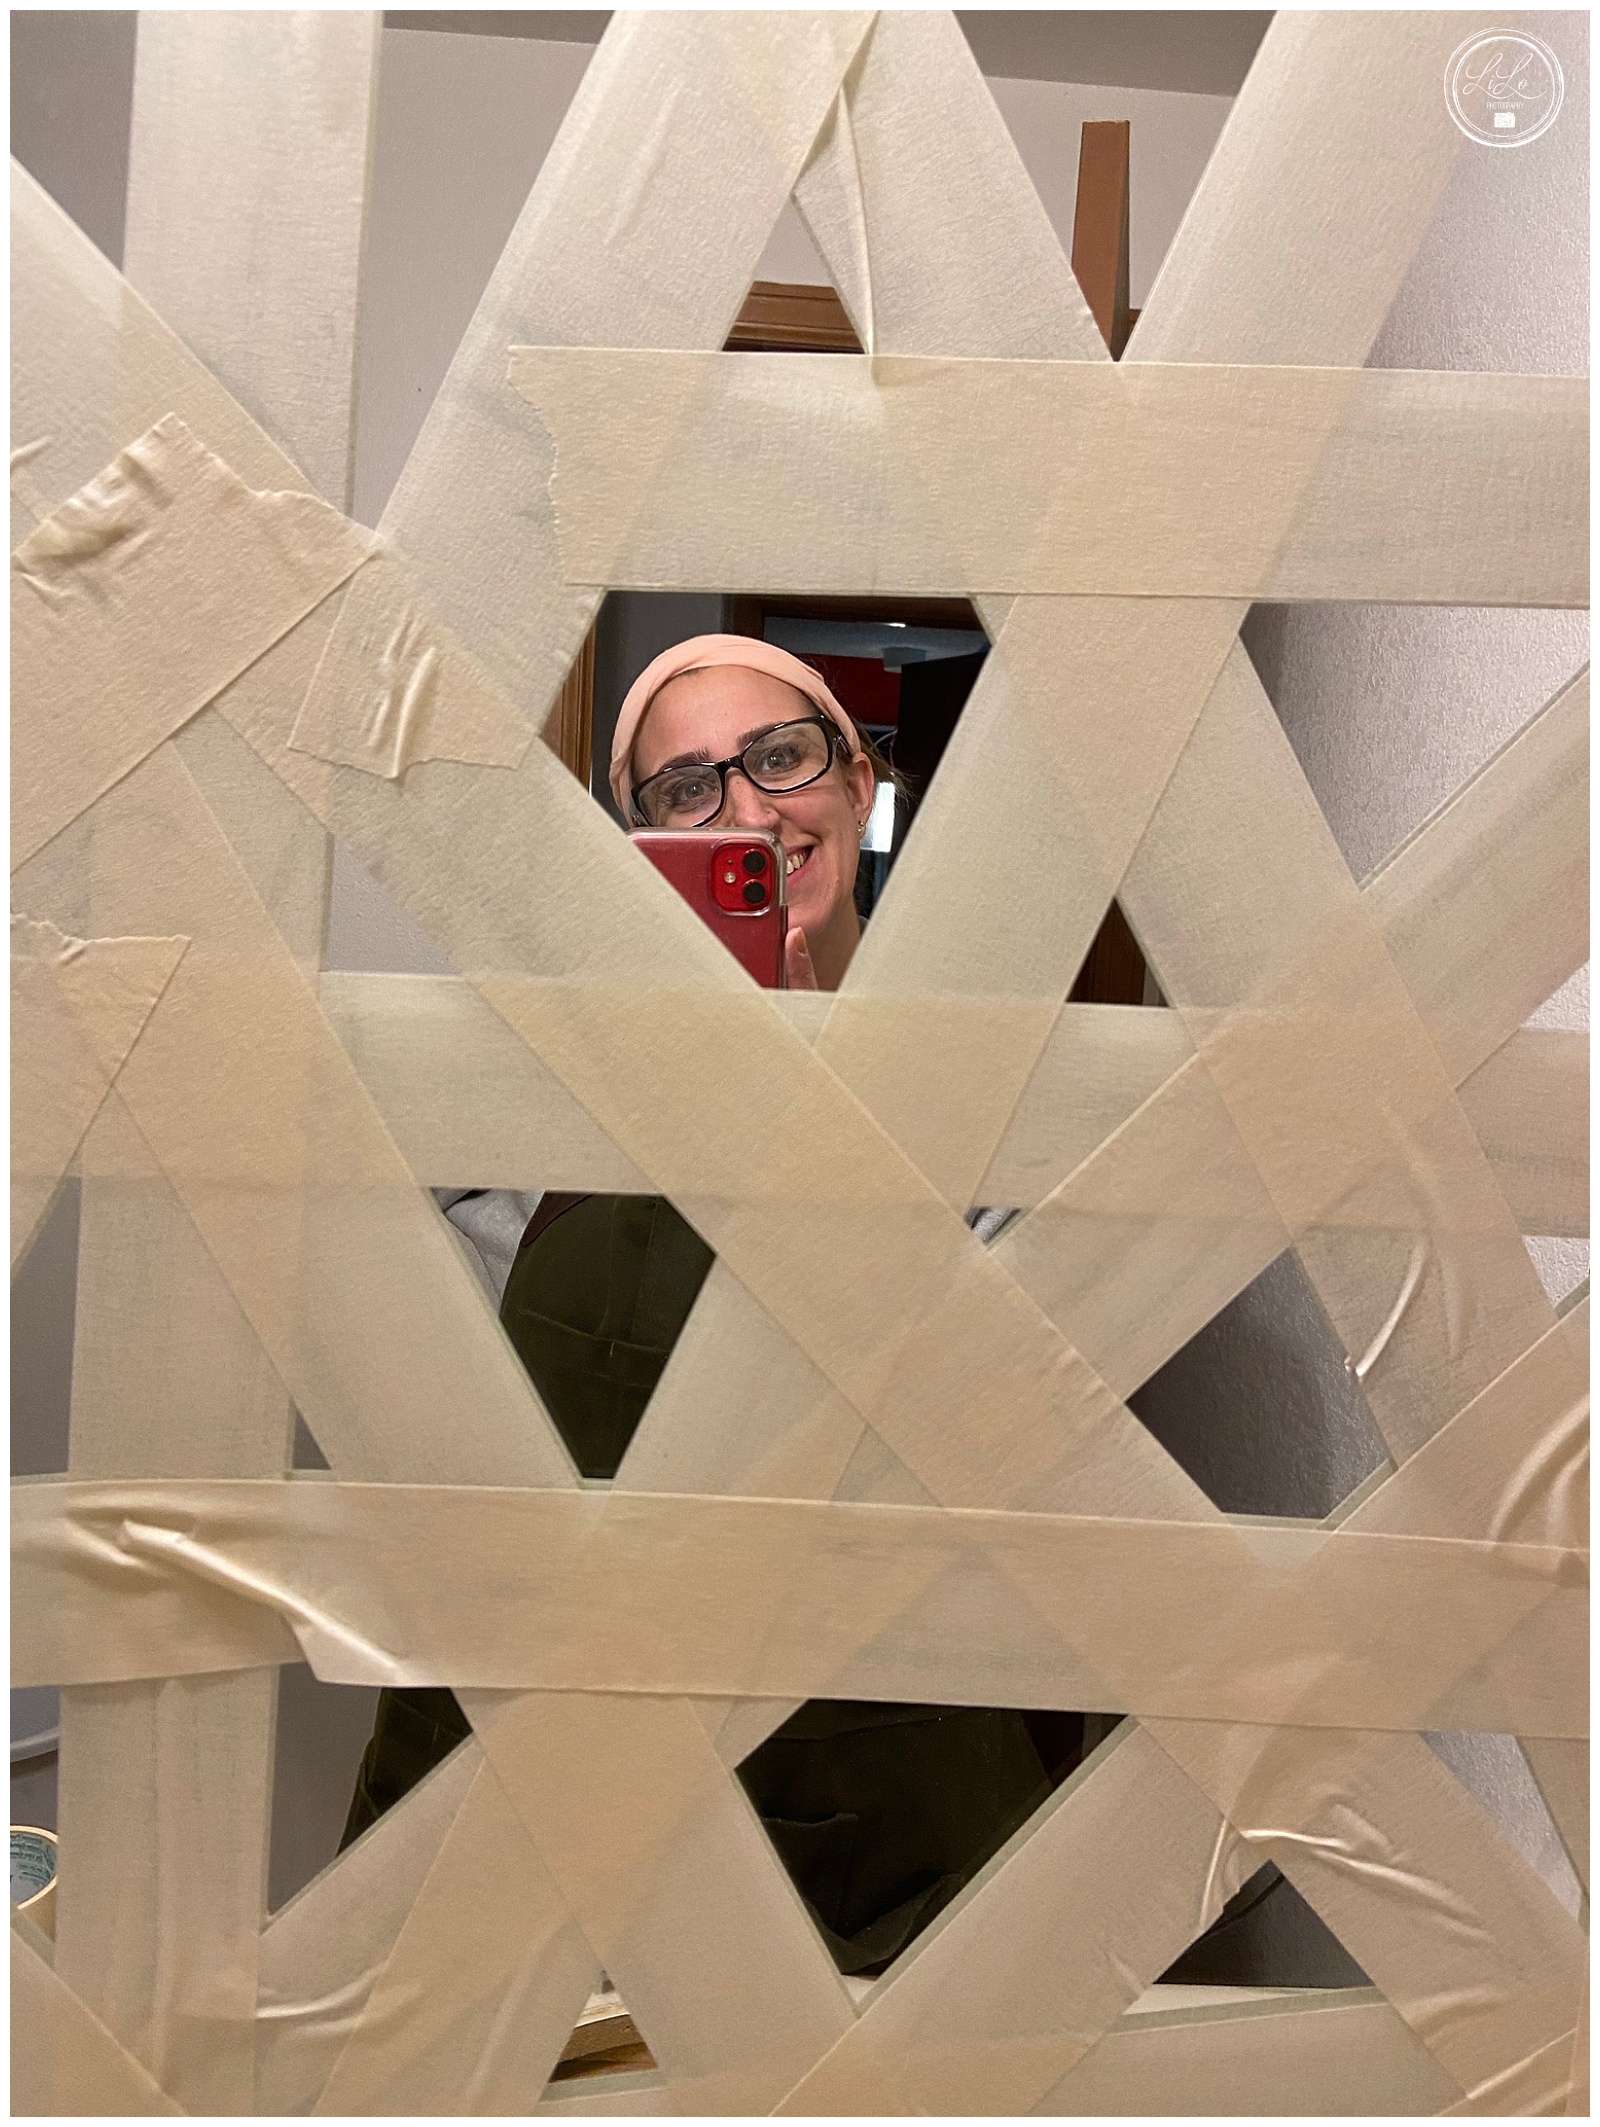
During:
I took daily pictures and reported my progress on Instagram. It is all saved on a highlight in my profile labeled “Bathroom” if you want to see the play by play action. I am not much of a selfie person, but this deserved to be documented so here you go.
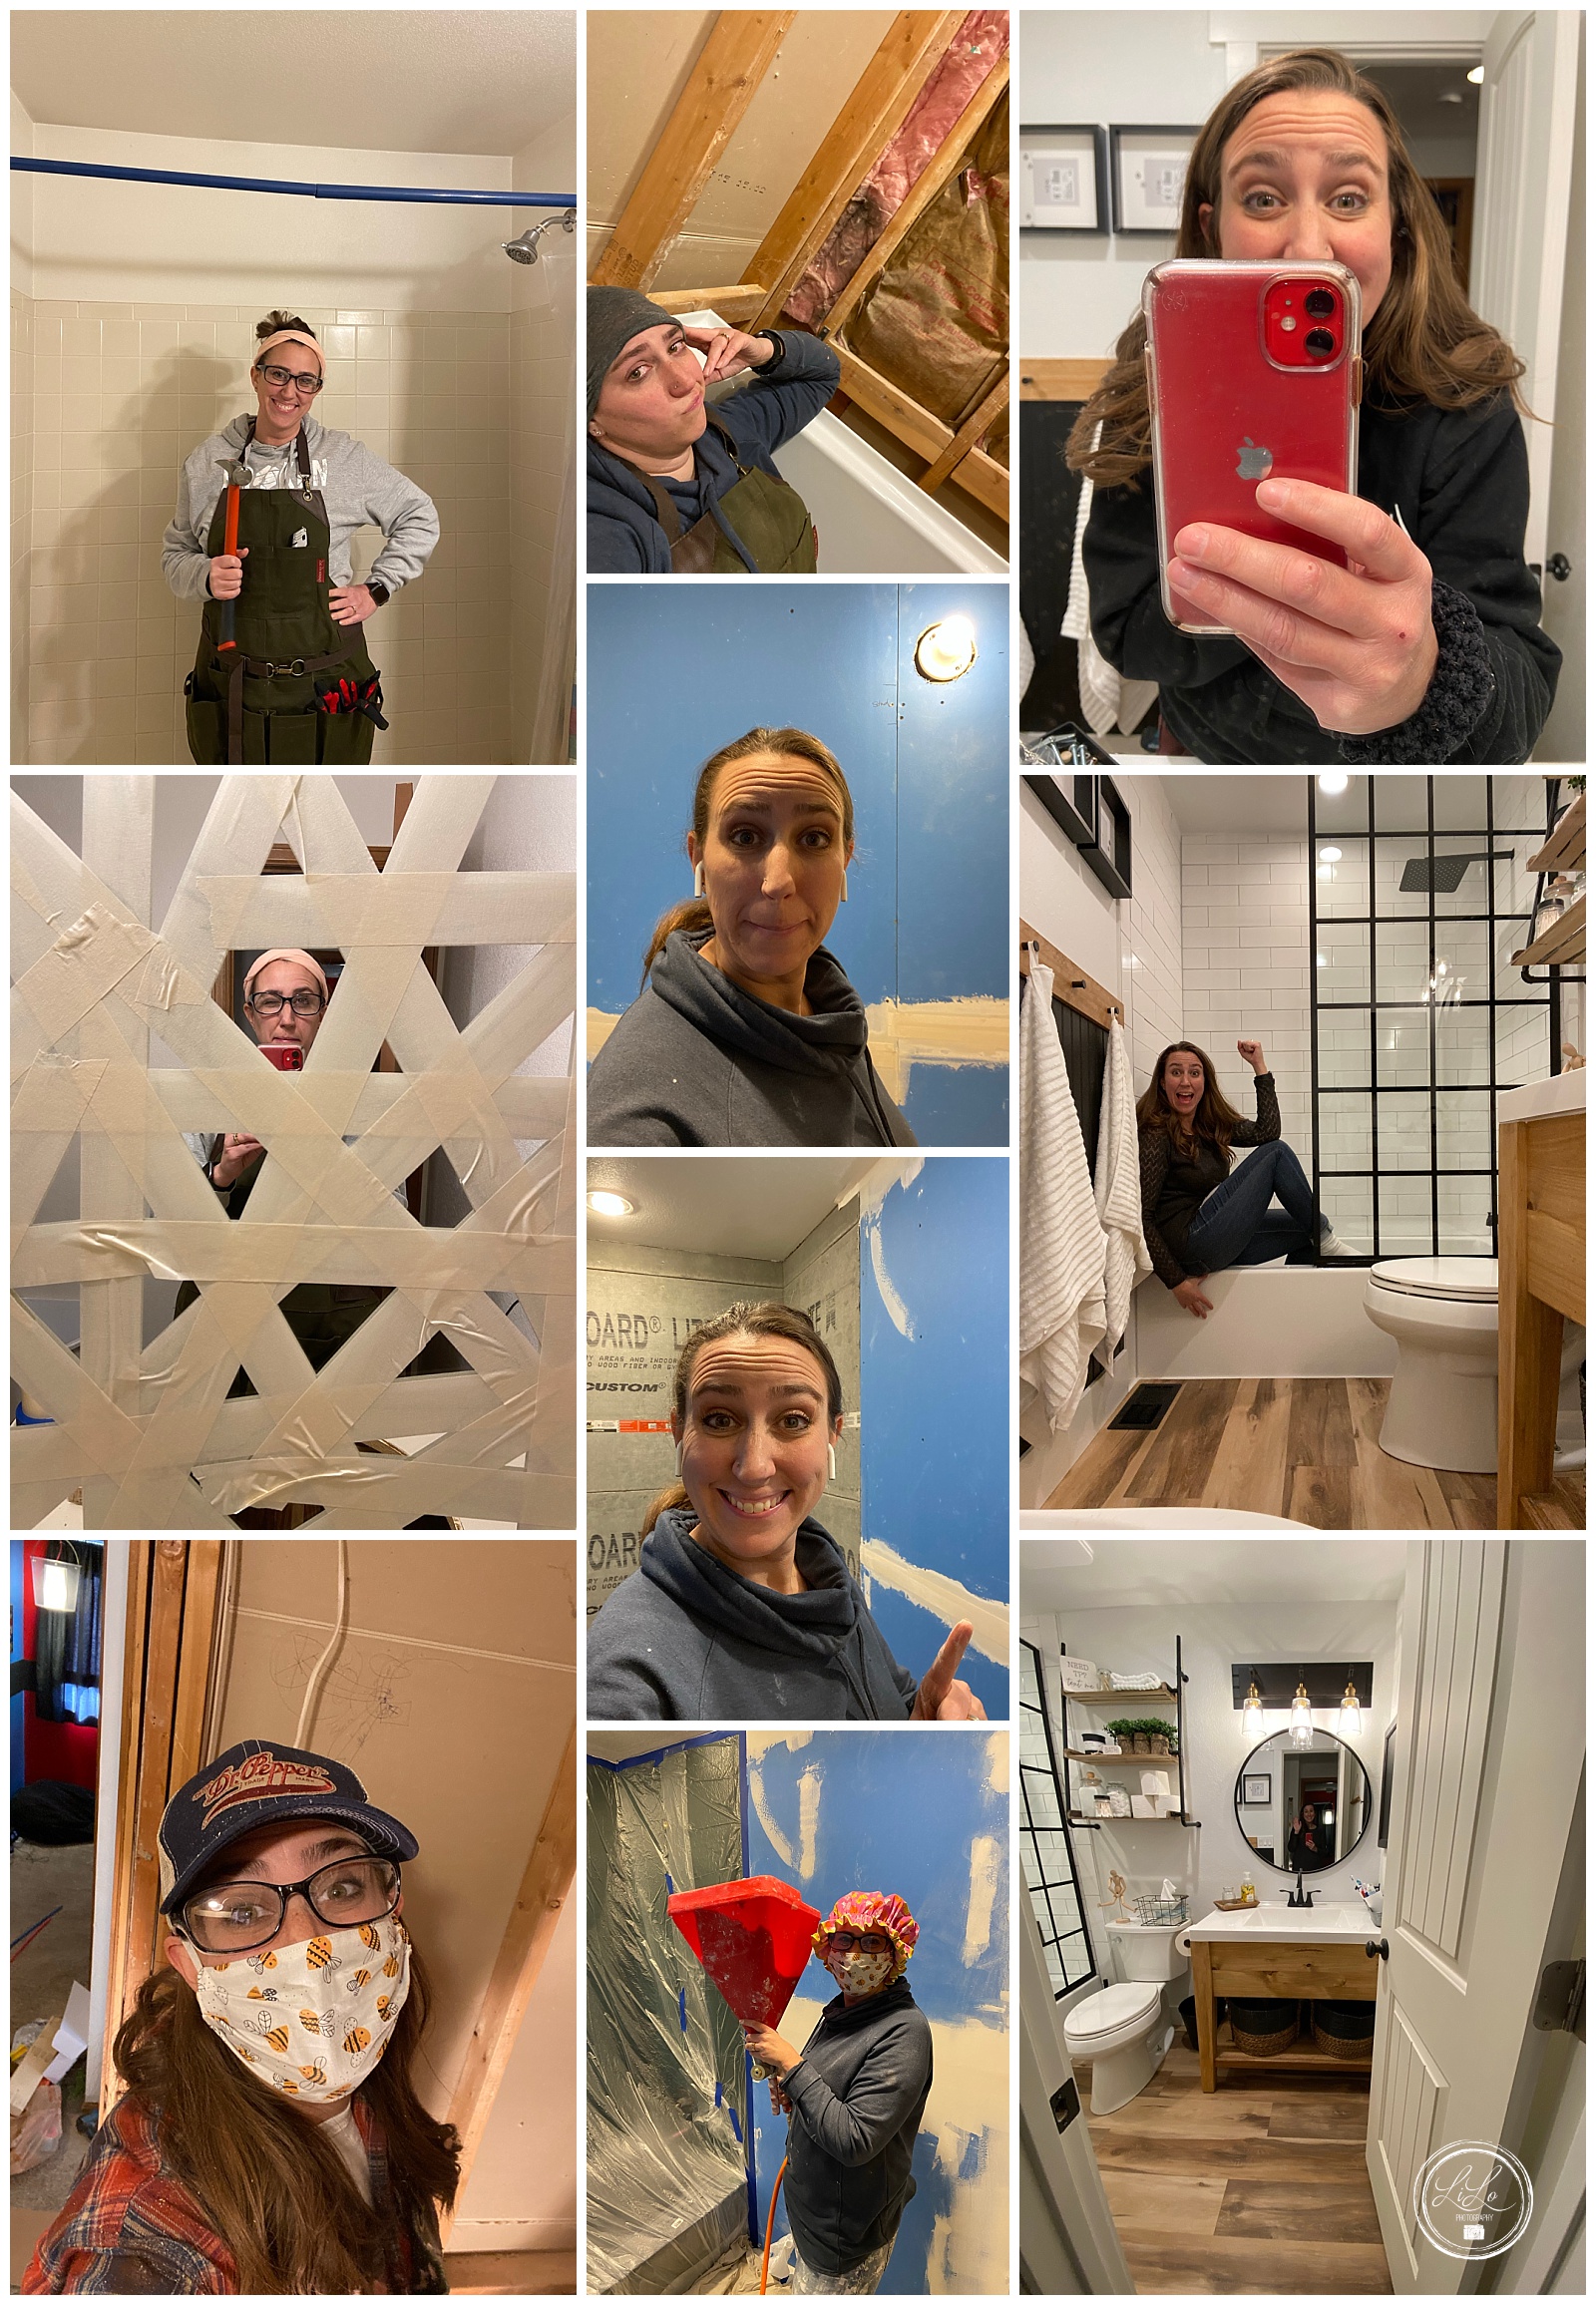
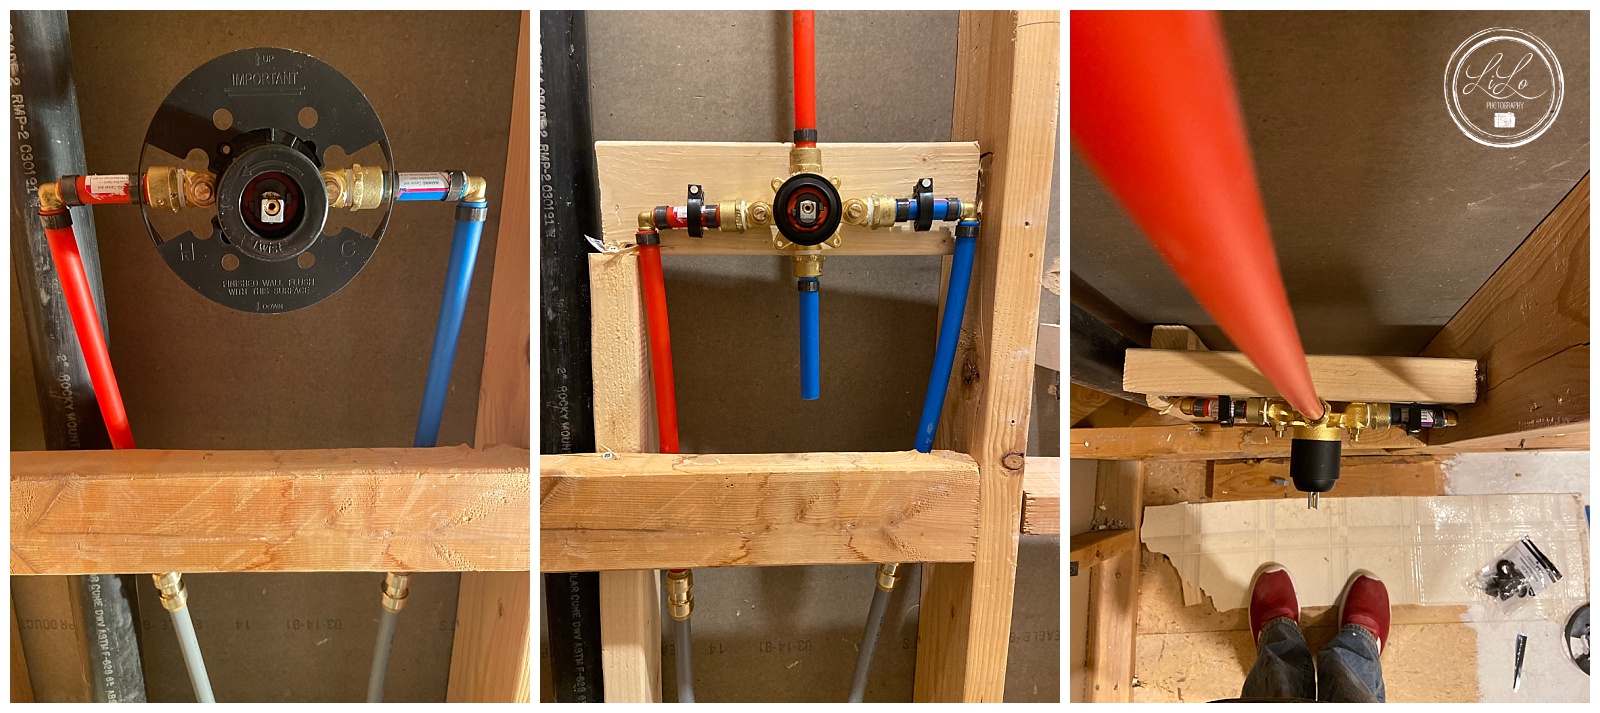
My dad came over quite a bit (especially at the beginning of the project) and carefully talked me through electrical and plumbing. He let me do all of the work and was just there as my Yoda. I did all of the work…he did a lot of the guiding. He also made the plans and helped me budget and order the supplies (lifesaver).
Here are the things I did…
- -Demo
- -Added a new light switch (for 3 total)
- -Rewired said switch and box
- -Put in a new fan
- -Added 2 can lights in the ceiling
- -New plumbing for bathtub and sink
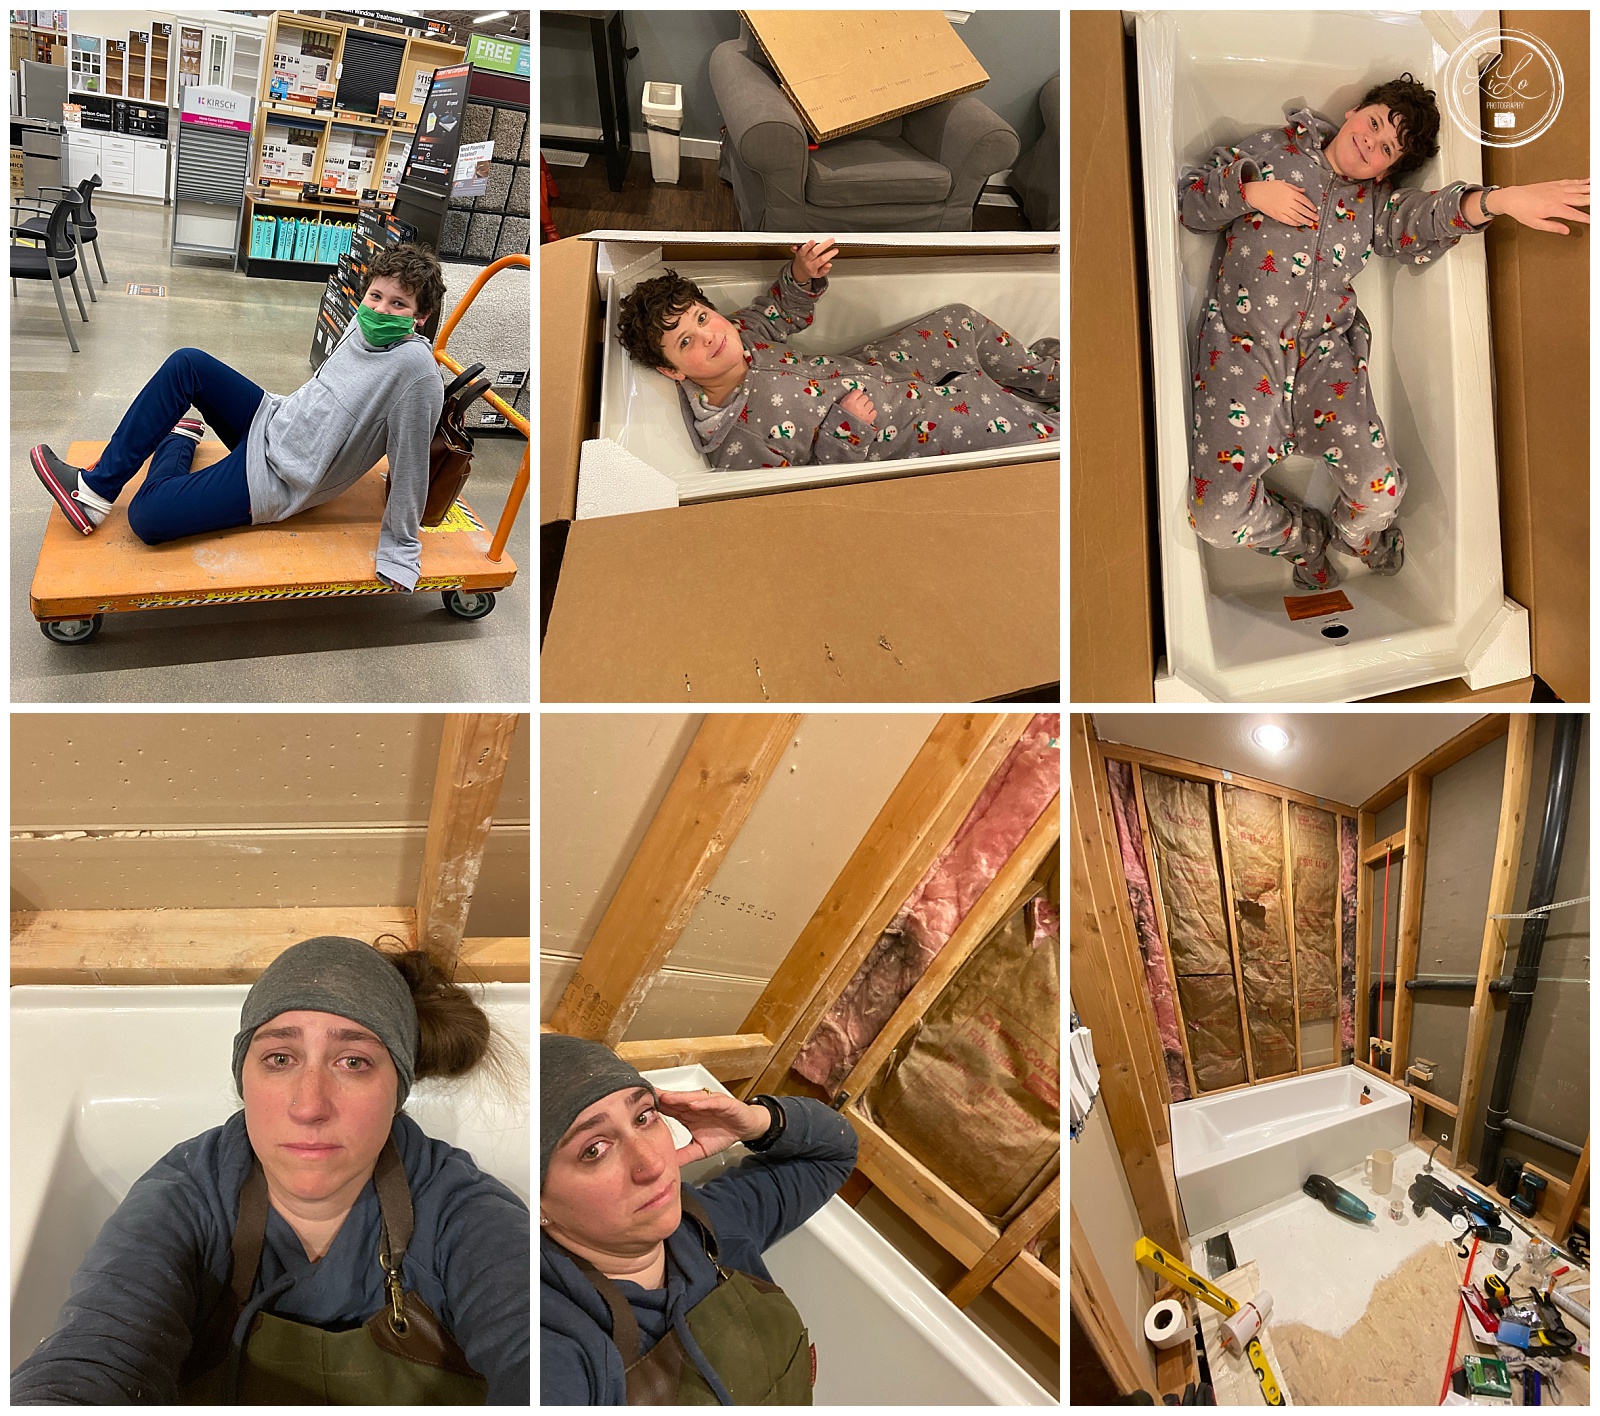
- -Insulation
- -Drywall
- -Taped and textured drywall and ceiling
- -Flooring (Chris helped)
- -Installed the bathtub and fixtures (this part had me in tears)
- -Caulking
- -Painting (with the help of Vicki–true friends help you paint)
- -Shower prep (hardy backer, waterproofing)
- -Tile (this part was THE WORST)
- -Grout (just kidding this was the worst of the worst)
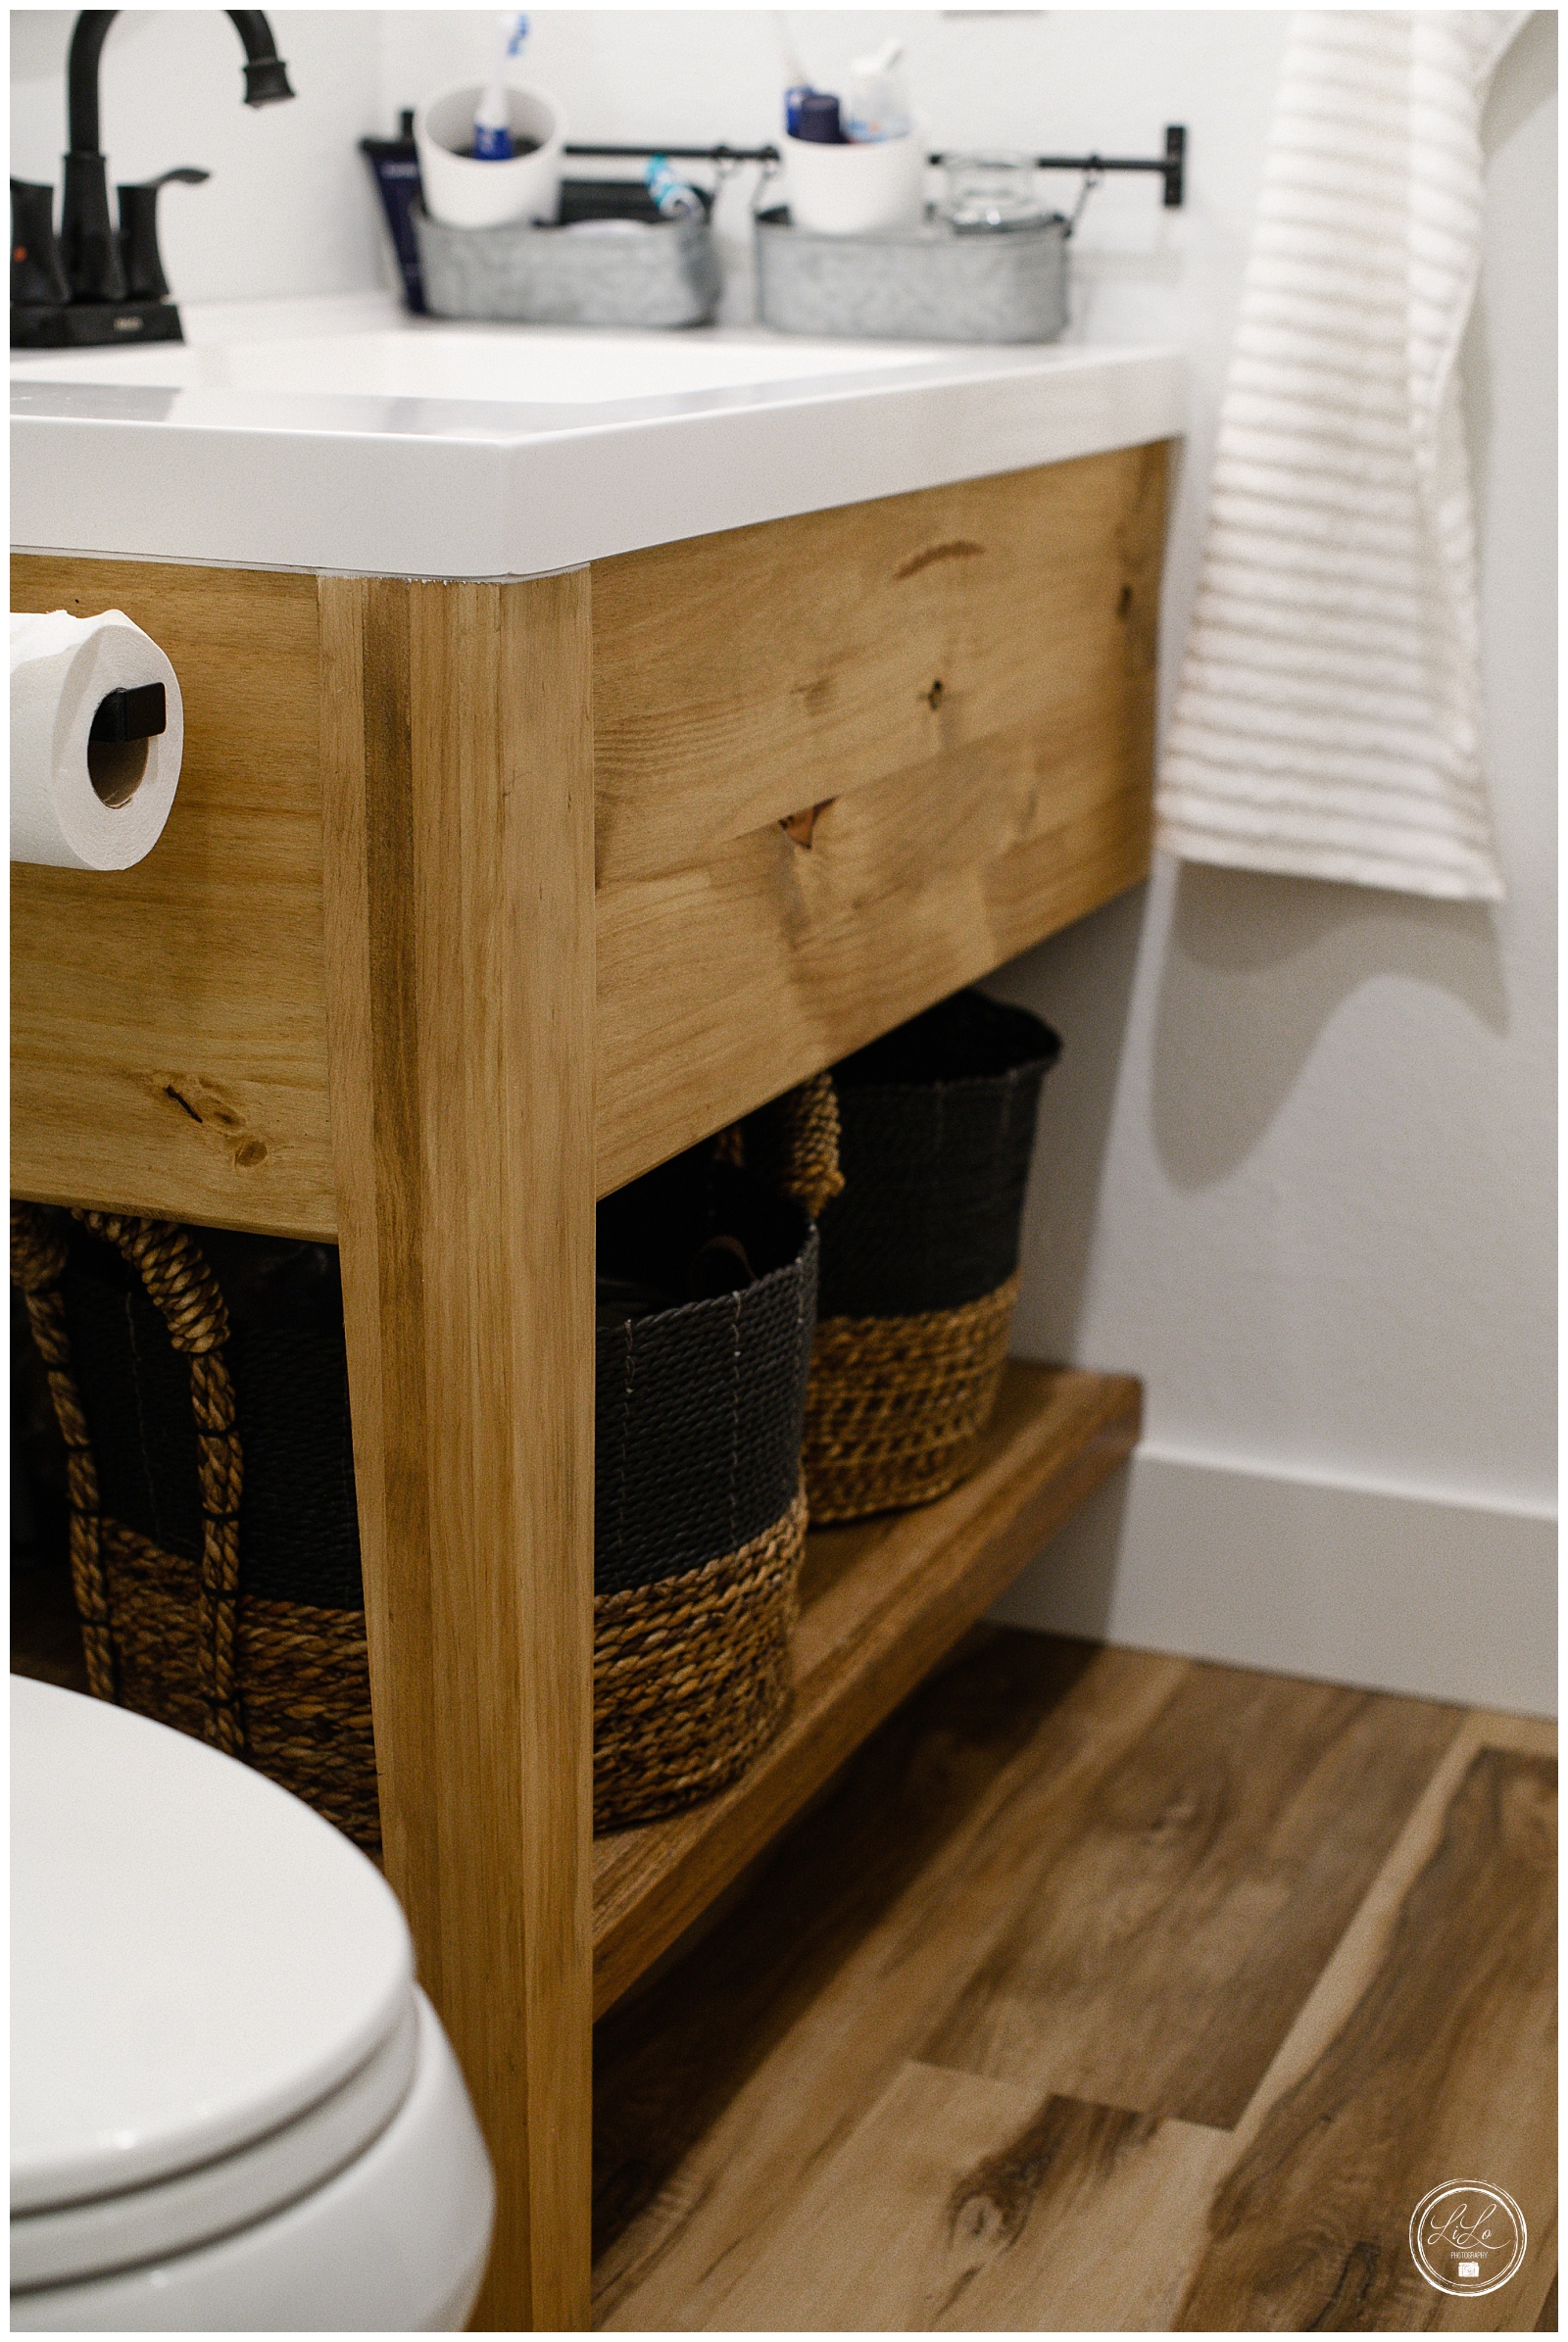
- -Built a vanity (with Chris’ help). See the blog on how we did the vanity here.
- -Beadboard and towel rack
- -Hung the door
- -Installed mirror
- -Painted medicine cabinet
- -Wired and installed vanity light
- -Plumbing for sink
- -Installed sink
- -Installed faucet
- -Hung pictures
- -Decorated it

All of this in 37 days. By myself (with a little help from Chris….you know I wasn’t about to take out or put in the toilet). I am not going to lie….it was REALLY hard and my body hurt for about 37 days, but it was worth it! I even got to leave a little note in the wall.

These helpers really came in clutch!
Don’t mind me….just crying in the bathtub at a low point. Also, peep my little helper. He loves to take baths so he was my tester.
FAQ’s
What was the hardest part? The bathtub and tile. We are getting ready to do our master bathroom and you better believe we are going to pay good money to have someone come and do the tile work for us. The grout alone took me 5 hours (of non-stop work because if you stop….it hardens). My fingers and hands were bloody and raw for DAYS and my back and shoulders are still recovering. I have mad respect for tile guys.
What was the best part? I loved doing the electrical. There is something so satisfying about wiring and then turning on the switch and having light! It really isn’t as hard as you think it is but it makes a world of difference in a space. I love how light and bright this room is now.

The most intimidating part? PLUMBING. It is so scary to turn on the water and cringe to see if there are going to be leaks everywhere. And then when you put the drywall up and just pray that nothing goes wrong. It is seriously so scary. It really is pretty easy to do….but I was so worried that it was “too easy” and there were going to be problems down the line that were going to mess up what I had just made so pretty.

What is your favorite part of the finished product? I love the glass door. It makes it look more like a high-end shower and really gives the room a cool vibe. It is very different and I haven’t really seen it done anywhere else!
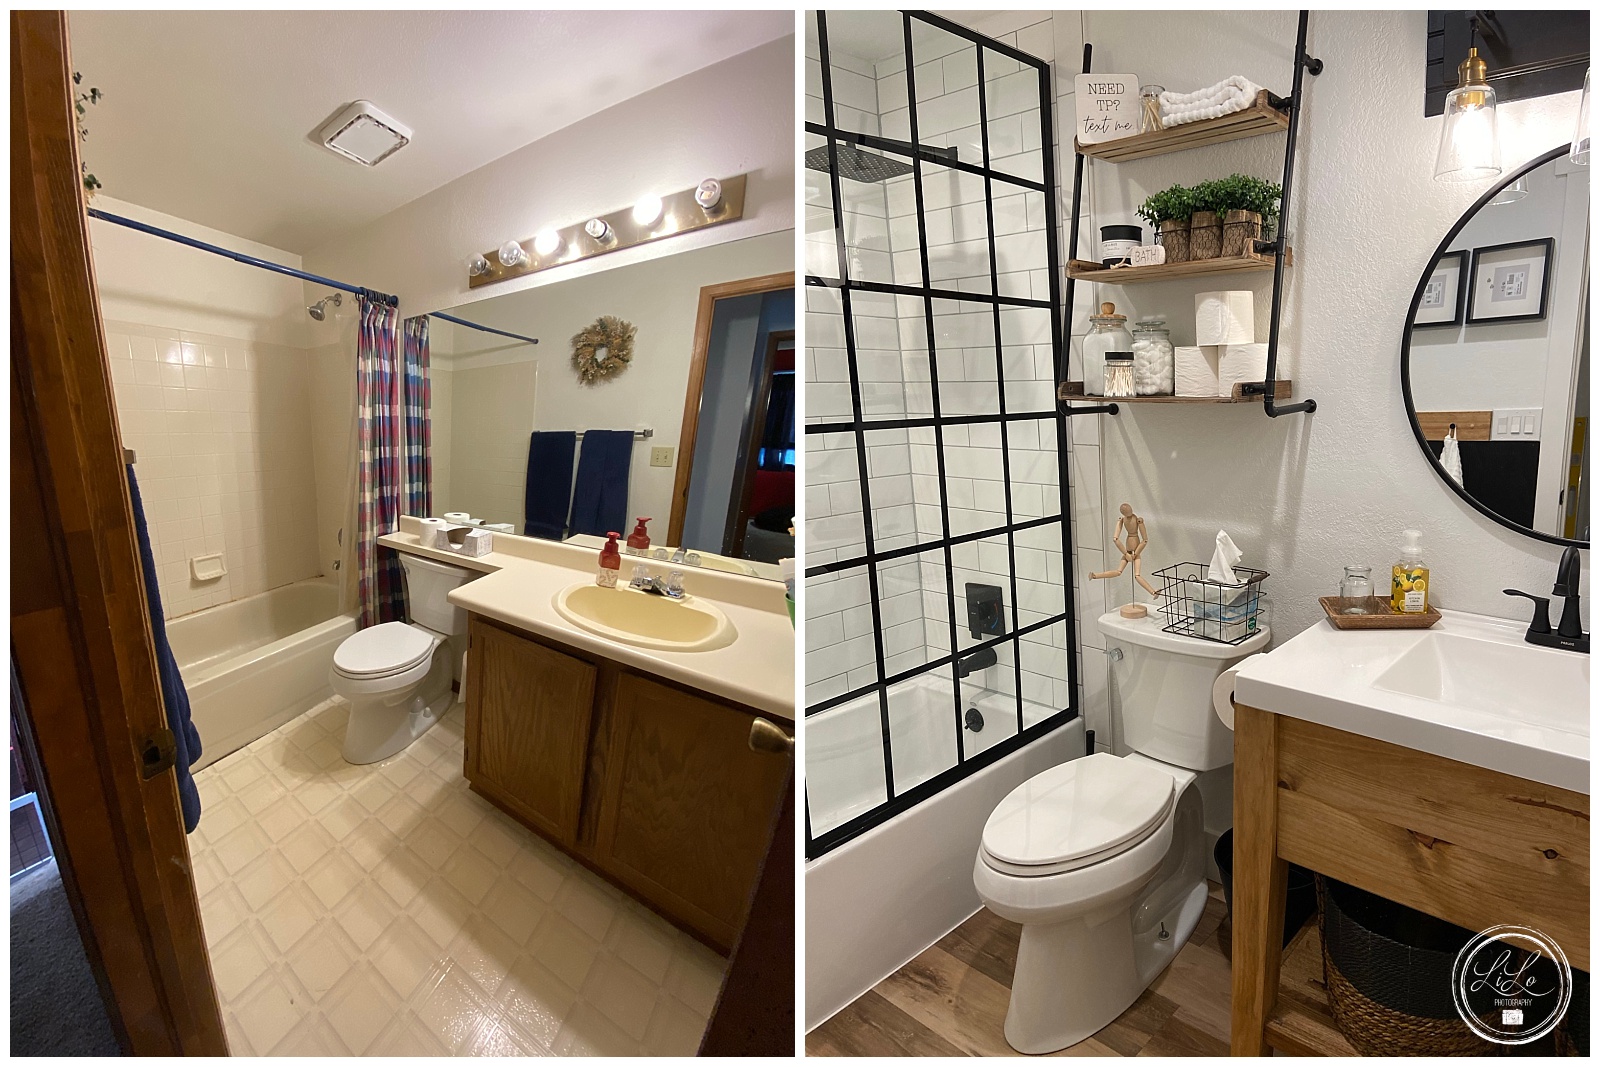
Let’s be honest….I know what you are all here for. The before and after. It is like those recipe blogs where they just dribble on for ever and all you really want is the dang recipe and you have to scroll all the way down to get it. #sorrynotsorry
What a difference, right?!
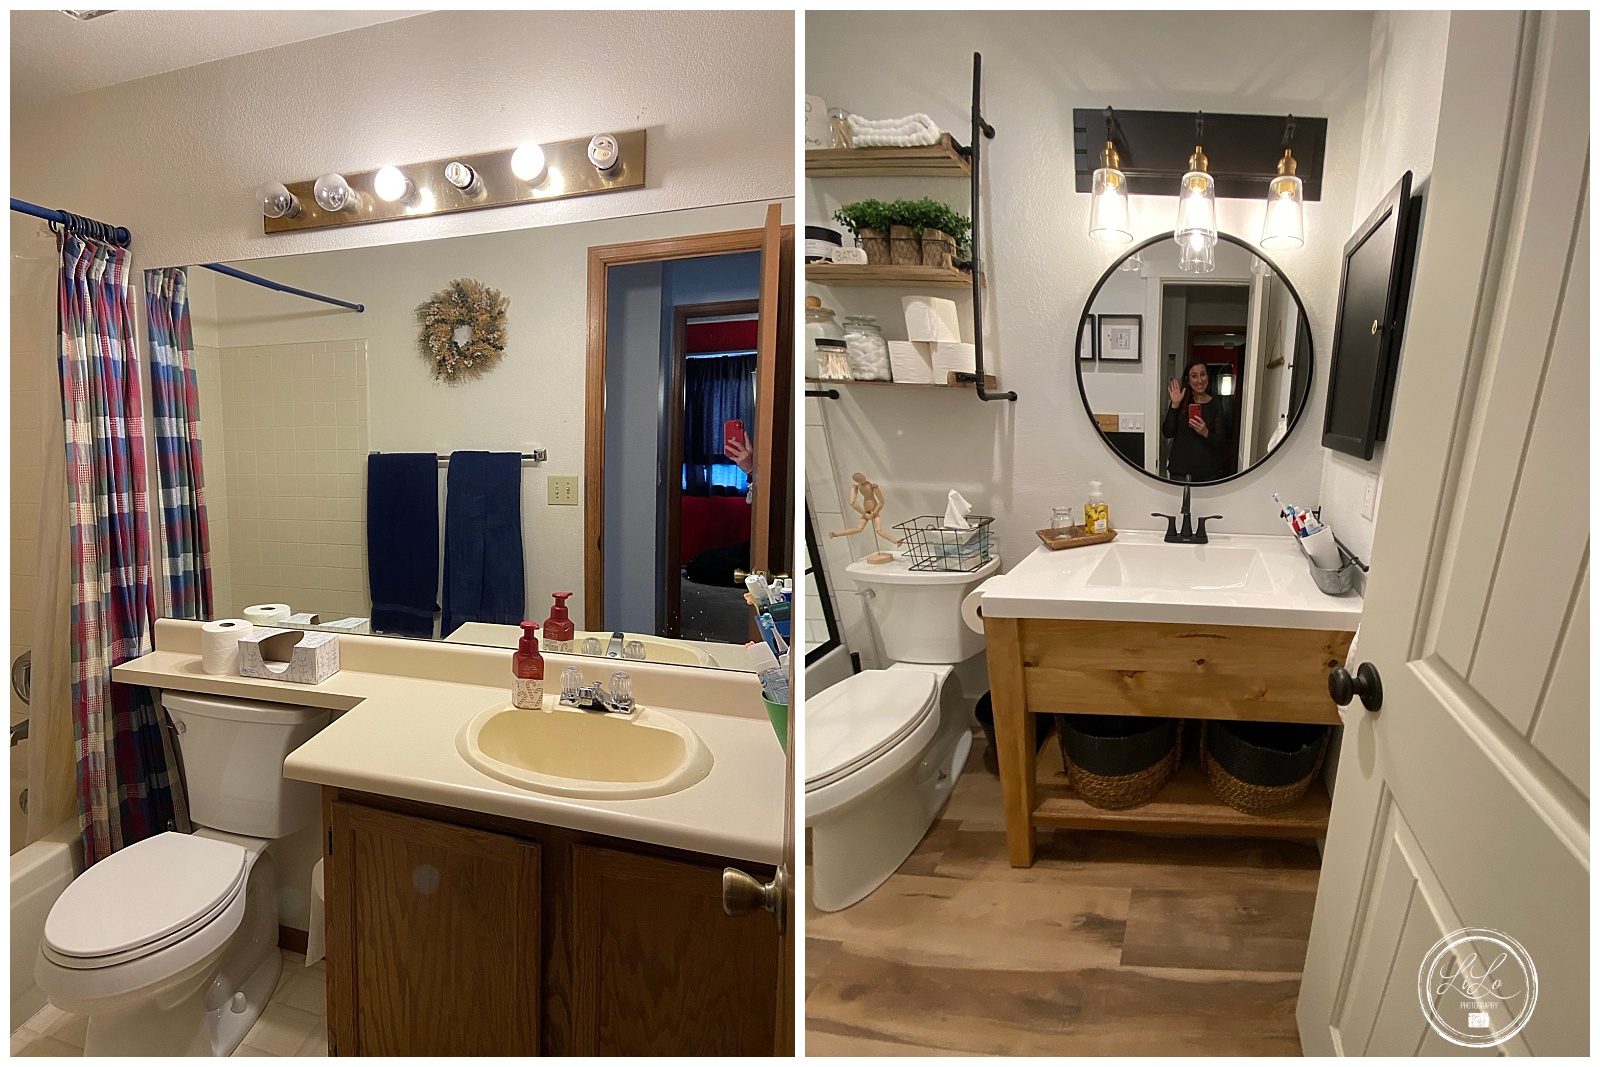
1991 called and it is so glad you have moved on!

Leave a comment below if you want to see where I got anything for this bathroom. I am happy to share links (if I have them).
Thanks for following along. I can’t wait for the next bathroom. And if you want a real blast from the past….check out our kitchen remodel part one and kitchen remodel part two.

")
")

Well done, Lisa. It is gorgeous!!!
Thanks! It was a fun project!